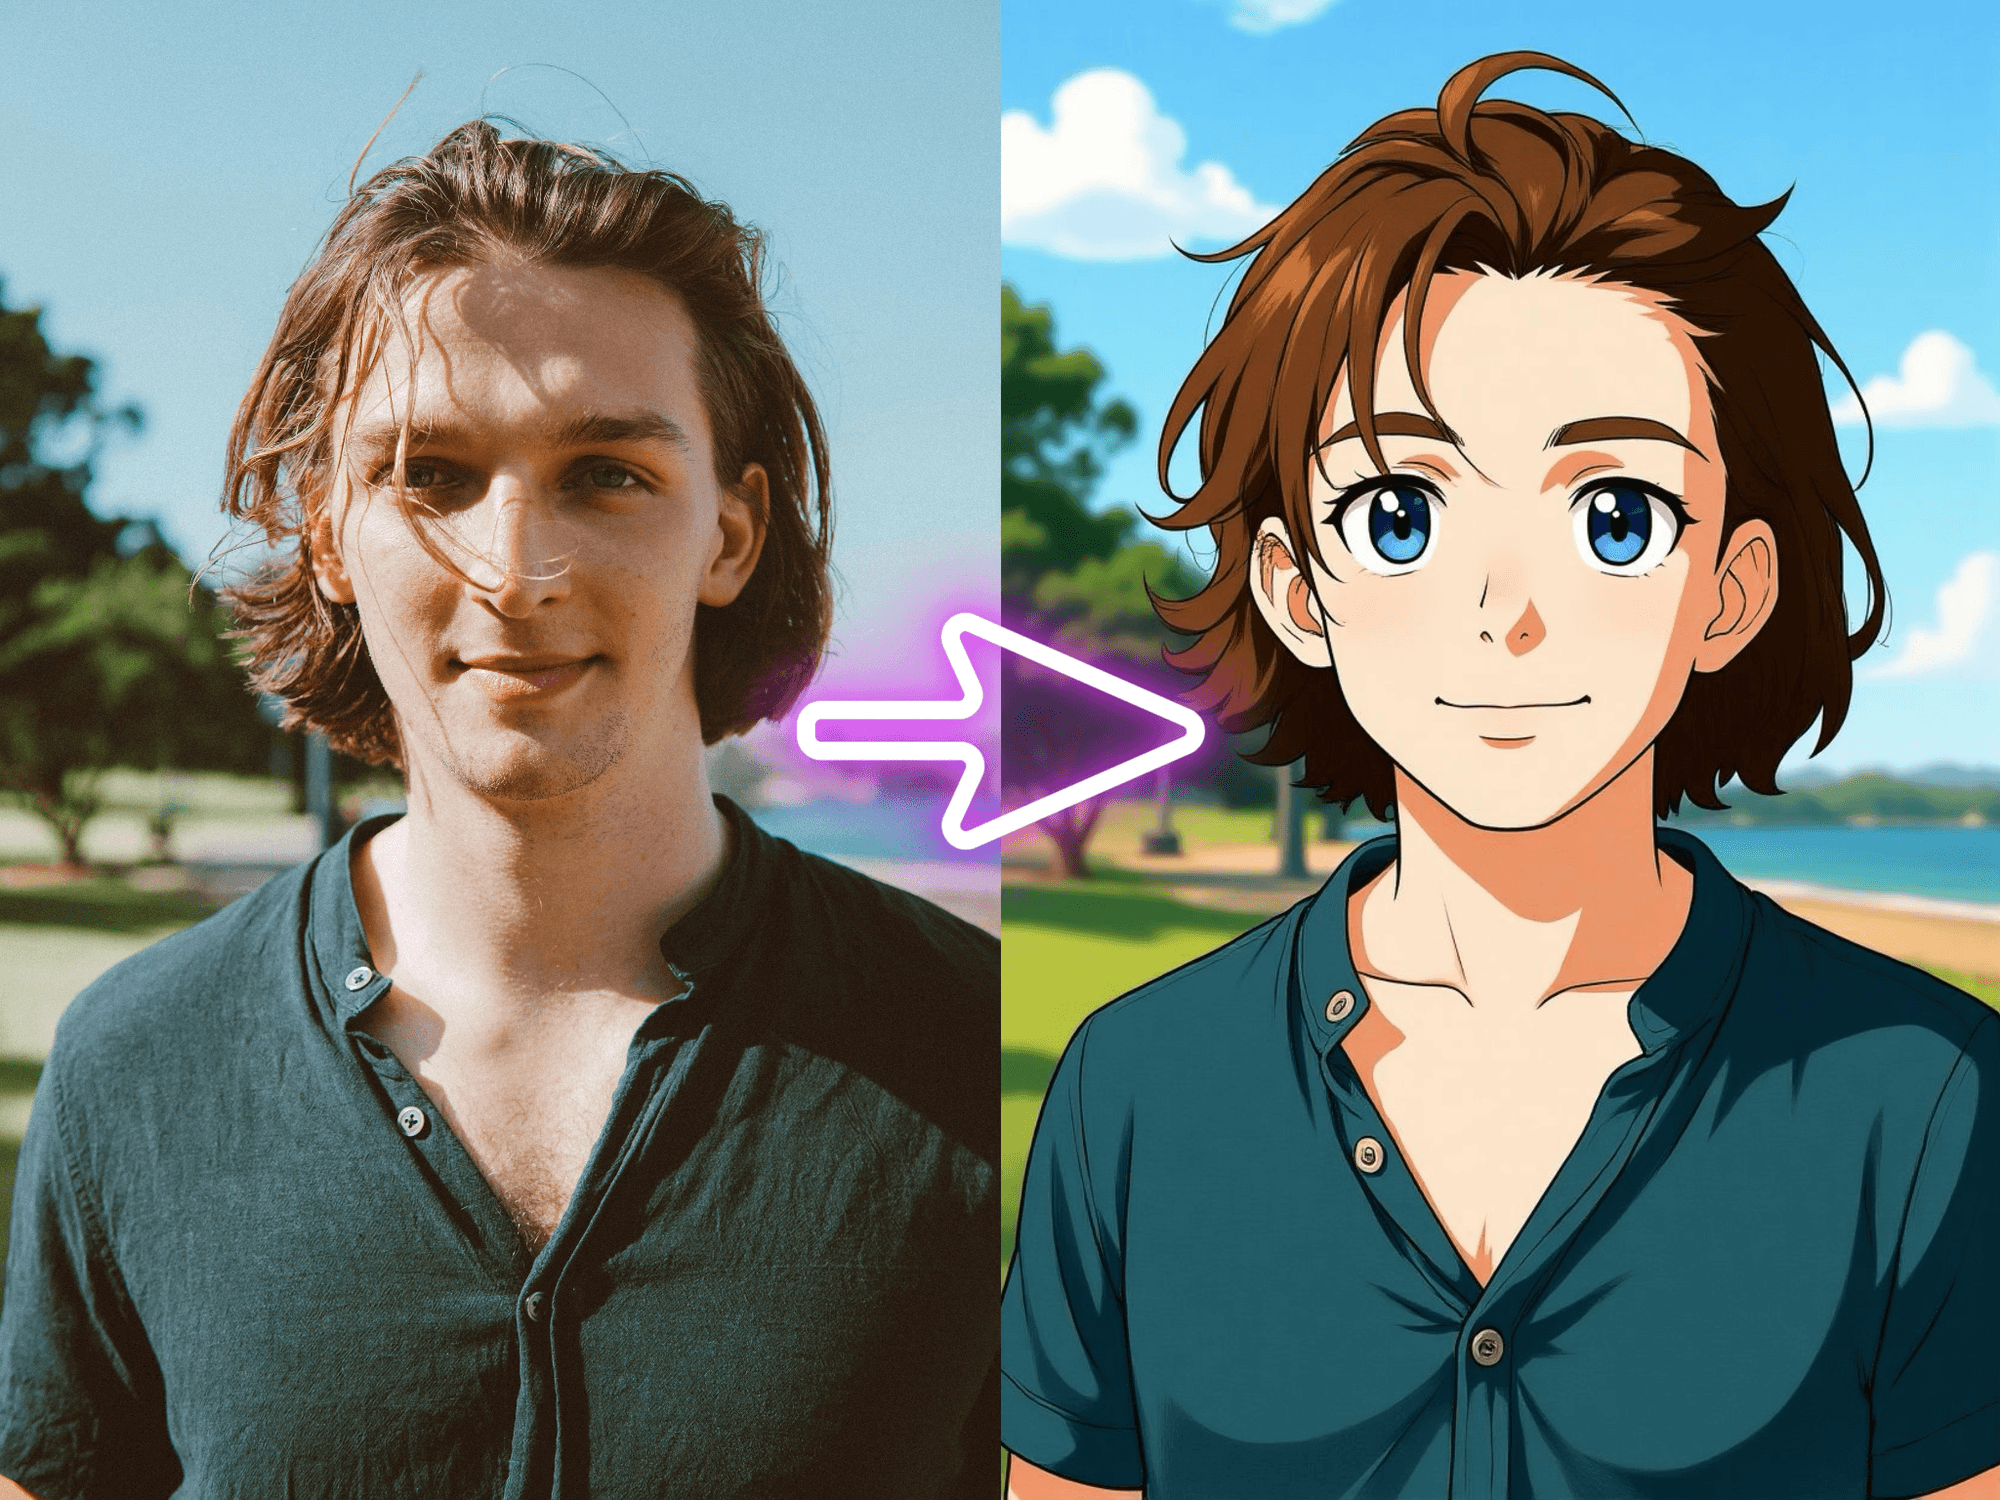
How Fans Turn Selfies Into Anime-Style Portraits With AI
Plenty of anime fans want to see themselves on the other side of the screen. They want a profile picture that looks like a main character, a cosplay reference, or a portrait for a tabletop campaign. A few years ago that meant commissioning an artist or learning to draw. Now an AI tool can turn a selfie into an anime-style portrait in a few minutes.
The results vary a lot, though. Some portraits look like you in a new style. Others look like a stranger with big eyes. This guide explains how the process works, how to get better results, and how to use these tools responsibly.
What "Selfie to Anime" Actually Means
The phrase covers three different approaches, and the differences matter.
Filters and style transfer. These apply an anime-like look directly over your photo. They're fast and keep your pose, but the style can feel shallow, and results may look like a retouched photo.
Reference-based generation. You upload a selfie as a reference and add a text prompt. The AI builds a new image using your face, hair, and pose as a guide. It gives more control over style, outfit, and background.
Prompt-only generation. You describe a character in words, with no photo. It's good for original characters, but the result won't look like you.
Most fans who want a likeness use the second approach.
Picking a Tool
Tools fall into a few broad groups:
- Photo-editor apps with anime filters, which are quick and simple.
- General AI image generators, which can produce many styles, including anime, from a prompt or reference.
- Dedicated anime generators, which are tuned for characters, manga-style line art, and consistent looks.
TheCapCut ai anime generator is one example of the third kind. It starts from a prompt or a reference image, lets you compare different styles and compositions, and aims to keep details such as hairstyle, outfit, and color palette consistent across images. Whatever you choose, test a few before settling on one. Look at how each handles faces, hair, hands, glasses, and skin tone. Check what it does with your uploads, and read the terms of use.
Step by Step: From Selfie to Portrait

1. Choose a Good Source Photo
The photo sets the ceiling for the result.
- Use a clear, front-facing shot, or a slight three-quarter angle.
- Pick even lighting, without harsh shadows across the face.
- Avoid heavy filters, since they confuse the AI about your real features.
- Keep one face in the frame.
- Make sure hair, glasses and any accessories you want to keep are visible.
- Use a high-quality image, not a tiny or blurry one.
2. Decide on a Style
"Anime" is a broad label. Pick a direction before you generate.
- Cel-shaded modern anime: clean lines, flat color, and sharp highlights.
- Manga line art: black-and-white ink with screen tones.
- Soft, painterly illustration: gentle colors and a romantic mood.
- Retro 90s anime: muted colors, slightly grainy, classic proportions.
- Chibi: small, rounded, cute characters.
- Fantasy or sci-fi key art: dramatic lighting and costumes.
Aim for a general style, not a copy of a living artist or a specific studio. It's fairer to artists and often gives you a more original result.
3. Write a Useful Prompt
A good prompt keeps your identity and adds the rest. Include:
- Identity cues: hair color and length, eye color, glasses, freckles, beard, or other features you want kept.
- Expression: smiling, calm, determined, or mischievous.
- Outfit: hoodie, school uniform, armor, kimono, or streetwear.
- Background: city at night, cherry blossoms, classroom, or plain color.
- Lighting and mood: soft sunset, neon glow, or bright daylight.
- Framing: headshot, bust, or full body.
For example: "Anime-style portrait of the person in the reference photo, short dark hair, round glasses, warm smile, wearing a denim jacket, cherry blossom background, soft sunset light, clean cel shading."
4. Generate Several Versions
Make four or more variations, then compare. Differences in eye shape, face width, and hair can be large. Choose the one that captures your likeness best, not just the prettiest.
5. Refine One Change at a Time
If you change five things at once, you won't know what helped. Adjust a single element, such as the hair color, the expression, or the background, then compare the new version with the last.
6. Fix Problem Areas
Common issues and fixes:
Problem | What to try |
Looks like someone else | Use a clearer reference, add specific identity cues, or reduce style strength |
Eyes too large or generic | Describe your eye shape and color, and ask for natural proportions |
Hair is wrong | Specify length, parting, curl, and color |
Glasses distorted | Mention frame shape and color, and use a front-facing photo |
Skin tone shifts | Include your skin tone in the prompt and check that features are preserved |
Hands look odd | Crop to a headshot or hide hands |
Messy background | Use a plain background first, then add one later |
7. Finish and Export
Crop for the final use. A profile picture needs a tight crop on the face, while a banner needs more space. Check how it looks at small sizes, since many avatars display at tiny dimensions. If your tool allows it, upscale the final choice and save a copy of your prompt so you can repeat the style.
Ways Fans Use Anime Portraits
- Profile pictures for Discord, social media and gaming accounts
- Cosplay planning, to try outfits and color schemes
- Original characters (OCs) based on your own look
- Tabletop RPG characters, such as a D&D hero or villain
- Fan-club cards and trading cards with matching styles
- Gifts, such as a portrait of a friend, with their permission
Keeping a Consistent Character
If you want a set, such as an avatar, a card, and a banner, write a short character sheet first. Include hair, eyes, outfit, color palette, accessories, and personality. Reuse the same wording each time and keep the same reference photo. Change only the pose or setting. This helps the images look like the same person.

Use It Responsibly
AI portraits are fun, but a few rules matter.
Consent comes first. Upload your own selfies, or photos of people who have clearly agreed. Don't use photos of strangers, classmates, or celebrities without permission.
Protect minors. Don't upload or generate images of children without a parent or guardian's consent, and never create sexualised images of anyone, including anime-style ones.
Think about privacy. A selfie is personal data. Read how the tool stores and uses your uploads, whether they're deleted and whether they're used to train models.
Respect artists and characters. Don't present AI images as the work of a named artist, and avoid recreating existing copyrighted characters for commercial use. An original character is safer.
Check the license. If you plan to sell merchandise or use portraits commercially, read the tool's terms first.
Be honest. Label AI-generated art when you share it, especially in art communities that restrict it.
Quick Checklist
- Pick a clear, well-lit selfie.
- Choose a style, not an artist.
- Write a prompt with identity cues.
- Generate several versions.
- Refine one thing at a time.
- Check the tool's privacy and license terms.
- Label the result as AI-generated.
FAQ
Will the anime portrait look exactly like me?
Not exactly. Anime style simplifies features, so the goal is recognisability. Clear reference photos and specific prompts help.
Can I use the portrait as a profile picture?
Usually yes for personal use, but check the tool's terms and the platform's rules.
Can I make portraits of friends or family?
Only with their permission. Ask before uploading their photos.
Why do results differ each time?
AI generation includes randomness, and small wording changes can shift the result. Save prompts that work.
The Takeaway
Turning a selfie into an anime portrait is easier than ever, but a good result still takes a little care. Start with a clear photo, choose a style, write a specific prompt, and refine step by step. Treat consent, privacy, and credit as part of the process. Do that, and you'll end up with a portrait that looks like you, in a world you've chosen.
