Bringing a new baby home involves a beautiful transformation of your domestic space. Parents spend months selecting safe cribs, sorting miniature garments, and designing an aesthetically pleasing environment. However, once the daily routine of infant care begins, practical considerations like room ventilation and waste disposal quickly take center stage. An infant can go through up to ten to twelve diaper changes a day, which introduces significant challenges regarding indoor air quality and cleanliness. Integrating a reliable diaper pail odor control system into your room layout is a highly ef fective way to address this reality, but true success requires a broader understanding of household dynamics. Managing nursery odor control is an ongoing process that combines smart layout planning, proper air circulation strategies, and structured sanitation habits.
When setting up a room for a newborn, caregivers must look beyond simple decorative trends and focus on functional zoning. The air volume in a standard residential bedroom can easily become stagnant if furniture layout, climate control fixtures, and waste collection points are arranged incorrectly. By understanding the underlying mechanics of indoor airflow and implementing a systematic approach to dirty diaper storage, you can build an environment that remains consistently fresh, safe, and comfortable for both you and your baby.
The Intersect of Room Ventilation and Infant Care
 The Intersect of Room Ventilation and Infant Care Miku
To establish an effective sanitation routine, it is helpful to analyze how air moves through a typical home nursery. Indoor environments are subject to a continuous accumulation of moisture, carbon dioxide, and volatile organic compounds (VOCs). When an infant care room lacks proper air exchange, these elements become concentrated, leading to a heavy, stale atmosphere.
The Problem of Stagnant Air Corners
Many modern homes are heavily insulated to maximize energy efficiency, which unintentionally limits natural fresh air exchange. In a nursery, specific corners can experience completely stagnant microclimates. If a diaper trash pail is placed in a structural dead-end—such as behind an open door or inside an unventilated closet—the air surrounding the unit remains trapped. Every time the lid is opened to deposit waste, a small amount of humid air escapes and settles into the immediate vicinity, attaching to nearby fabrics.
Temperature Acceleration
Warm temperatures act as a catalyst for organic decomposition. When household waste is subjected to heat, the breakdown of organic matter accelerates, causing gaseous emissions to expand. If your diaper changing station is positioned directly next to a radiator, a heating vent, or a window that receives intense afternoon sun, the internal temperature of your waste container will climb. This extra thermal pressure forces air out through microscopic gaps in structural seams, making temperature control a vital component of ambient room freshness.
Designing the Care Zone: A Strategic Layout Guide
An optimized nursery layout relies on functional zoning, separating areas meant for sleeping, feeding, and physical care. The care zone—comprising the changing surface, clean storage, and the diaper disposal system—must be engineered for maximum physical efficiency and rapid waste isolation.
The Immediate Access Radius
When changing a newborn, safety regulations dictate that a caregiver must never leave the infant unattended on an elevated surface. Therefore, your waste container must reside within what interior designers call the immediate access radius. You should be able to drop a rolled diaper into the bin using a single, fluid movement without taking a step away from the changing pad. A foot-pedal operated mechanism is incredibly valuable here, keeping your hands entirely free to secure your child while the waste is isolated instantly.
Distance from the Sleeping Zone
While the care zone requires compact efficiency, it should be physically removed from the sleeping zone. Ideally, place the crib on the opposite wall from the waste containment unit. This structural separation ensures that any subtle mechanical sounds from opening the lid, or minor air shifts during an active changing session, do not interrupt an infant’s delicate sleep cycle.
Best Practices for Managing Dirty Diaper Storage
 Best Practices for Managing Dirty Diaper Storage Photo by Lisa Anna on Unsplash
How individual items are handled before and during disposal plays an important role in overall room cleanliness. Simple adjustments to your physical routine can drastically reduce the environmental load inside your containment bin.
- Tightly Secure the Tabs: Always roll a dirty diaper as tightly as possible, using the built-in adhesive side tabs to lock the bundle into a dense, secure sphere. Minimizing exposed surface area slows down the evaporation of moisture and the escape of internal gases.
- Isolate Advanced Odors: For older infants who have transitioned to solid foods, the nature of household waste changes significantly. Whenever possible, clear loose solid matter directly into a standard bathroom toilet before wrapping the diaper. For exceptionally difficult cleanup scenarios, consider placing the individual diaper into a small, biodegradable disposal pouch before depositing it into the primary bin.
- Maintain a Uniform Emptying Cycle: Do not wait for your specialized bin to reach maximum physical capacity before replacing the liner. In standard household environments, establishing a routine to empty the containment system every two to three days prevents excessive moisture accumulation, which naturally keeps ambient smells under control.
Enhancing Air Quality with Supplemental Tools
While a robust, airtight containment bin serves as your primary defense, secondary air purification tools can capture stray particles that escape into the room during active changing processes.
Tool Type | Mode of Operation | Strategic Placement |
HEPA Air Purifiers | Physically captures fine airborne particles and circulating dust through dense fiber networks. | Place on a dresser or shelf across the room from the crib to encourage steady, gentle air movement. |
Activated Charcoal Bags | Passively adsorbs moisture and airborne chemical compounds without introducing synthetic scents. | Hang directly behind the changing table or tuck inside nearby cabinet storage out of an infant's reach. |
Baking Soda Cartridges | Chemically neutralizes acidic compounds common in infant waste environments. | Secure directly inside the base or underside of the waste container lid for immediate containment. |
Safety Reminder: Avoid using heavy chemical masking sprays, aerosol air fresheners, or synthetic plug-in perfumes in an infant’s room. These products do not eliminate odor molecules; they merely overpower the air with artificial fragrances, which can easily irritate a newborn's sensitive respiratory passages.
Cleaning and Sanitizing Your Disposal Equipment
 Airthings Renew Air Purifier GearBrain
Even the most advanced waste management systems require direct physical maintenance to perform optimally over long periods. Over time, humidity can create a baseline film inside any container that must be cleared away systematically.
The Monthly Deep Clean Protocol
Roughly once a month, take the empty container to a well-ventilated area or an outdoor patio for a comprehensive clean. Disassemble any removable lid components or cartridge housing according to the manufacturer's guidelines. Spray the interior walls thoroughly with a simple solution of equal parts warm water and white vinegar, mixed with a few drops of mild dish soap.
Focus on the Structural Seals
Pay close attention to the flexible rubber or silicone gaskets lining the rim of the lid. These components create the airtight seal necessary for effective containment. Use a soft cloth or a soft-bristled brush to gently clean out any dust, lint, or structural debris that might prevent the lid from seating perfectly flat.
The Importance of Complete Air Drying
The most common mistake parents make is reassembling a waste system while it is still slightly damp. Trapping water inside a dark, closed bin will rapidly produce musty smells. Allow the empty container to sit completely open in direct sunlight for at least one to two hours. The natural ultraviolet rays work as an excellent, chemical-free deodorizer, ensuring the material is perfectly dry before you insert fresh diaper pail refills.
FAQs
 The Monthly Deep Clean Protocol GearBrain
Can you use standard kitchen trash bags in a diaper pail?
This depends entirely on the design of the specific diaper disposal system you own. Certain models feature adaptable internal collars that allow parents to stretch regular kitchen garbage bags across the rim, which can reduce long-term operational costs. However, many advanced systems perform best when paired with specialized continuous refills. These proprietary liners are typically constructed from multi-layered, high-density resins designed specifically to prevent molecular gas transmission, providing vastly superior odor containment compared to standard, single-layer household bags.
Where is the worst place to put a diaper pail in a nursery?
The worst location for a diaper pail is directly next to a primary heat source—such as a building radiator, heating register, or under a window receiving direct sunlight—or directly underneath an active HVAC supply vent. High temperatures cause internal waste to break down rapidly, increasing odor pressure, while placement under an air vent allows continuous drafts to carry stray particles across the bedroom the moment the lid is opened.
Why does my nursery still smell when the diaper trash pail is empty?
If a persistent smell remains after the bin has been completely emptied and washed, the odor molecules have likely migrated into surrounding porous textiles. Check nearby curtains, crib skirts, area rugs, or upholstered glider chairs. Washing these fabric elements, wiping down the wall directly behind the care station with a mild vinegar spray, and opening the windows to allow fresh air to circulate will usually clear out this lingering baseline scent.
How often should a diaper disposal system be completely cleaned?
While the liner bag should be replaced every few days, a comprehensive deep clean—involving full structural disassembly, seal maintenance, and an extended sun-drying session—should be performed roughly once a month. Doing so prevents long-term moisture buildup and keeps the structural materials from permanently absorbing odors.
Conclusion
Achieving a clean, fresh nursery environment requires a mindful balance between mechanical containment and spatial strategy. By utilizing an engineered waste isolation system, you establish a solid foundation for managing daily messes. However, maximizing this investment involves arranging your nursery layout to avoid high-heat microclimates and stagnant-air corners. Keeping your diaper changing station organized, ensuring your containment bin is within arm's reach for safety, and committing to a monthly deep-cleaning routine will keep your nursery air fresh and moving cleanly. With these practical structural habits in place, your baby's room will remain a sanitary, comfortable, and inviting space for your family.
From Your Site Articles
Related Articles Around the Web
 The Intersect of Room Ventilation and Infant Care Miku
  Best Practices for Managing Dirty Diaper Storage Photo by
 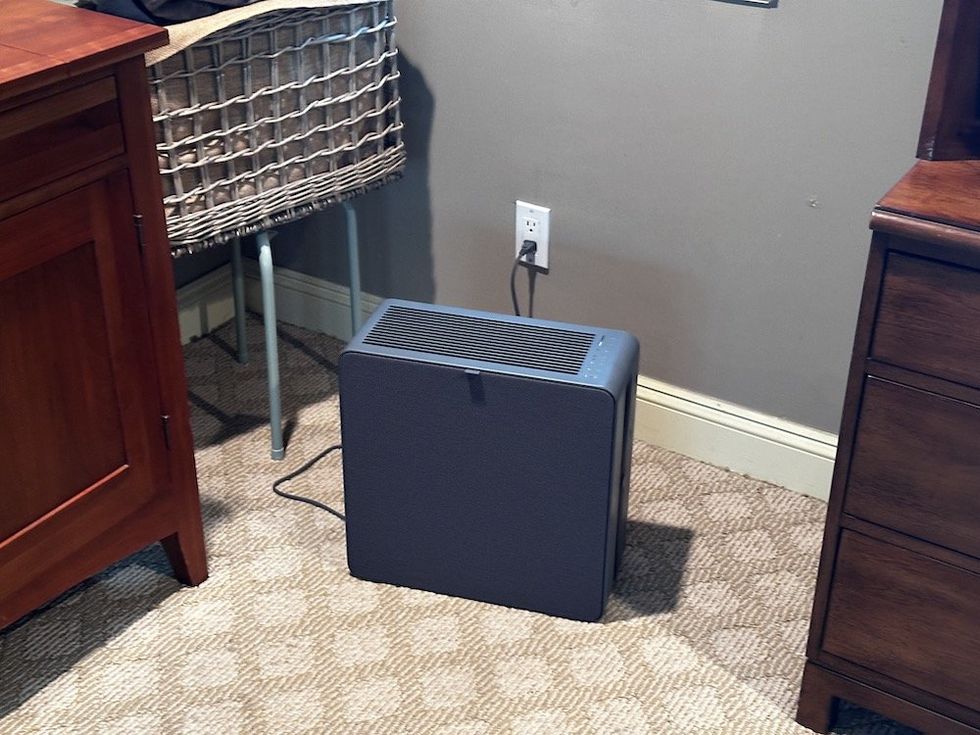 Airthings Renew Air Purifier GearBrain
  The Monthly Deep Clean Protocol GearBrain