The Conversation (0)
Business Apps

Frontpoint: Home Security Made Easy And Highly Protective
A DIY-installed home security system that's easy, with professional monitoring at an efficient cost
of the most important first big purchase for your new home is a home security system. Based on the cost of homes these days, it pays to have a security system that can protect your big investment. Unlike years ago when you only had one choice, you now have three different options to choose to secure your home:
The Setup
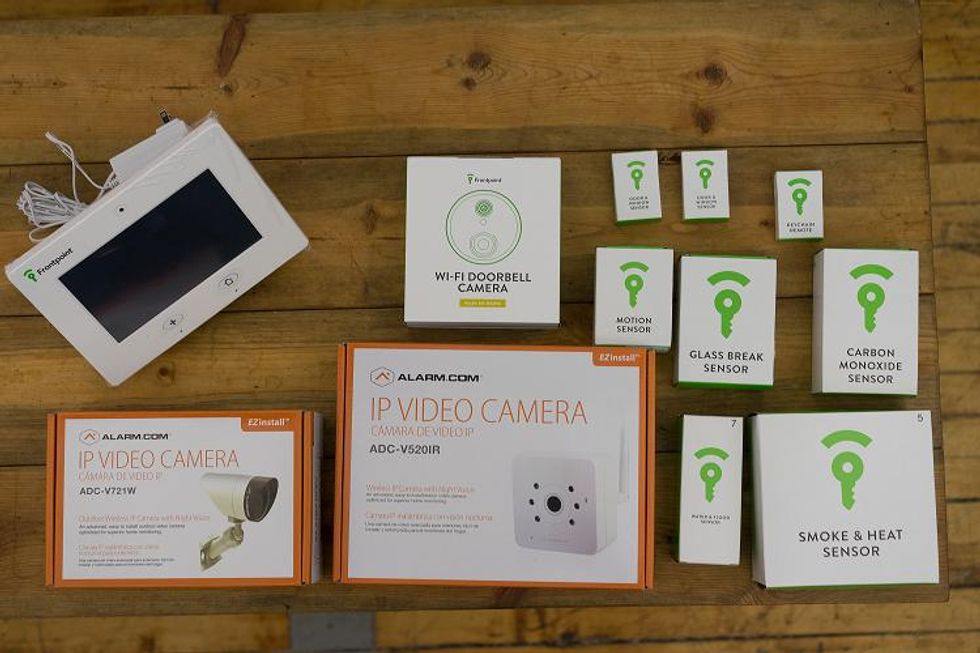
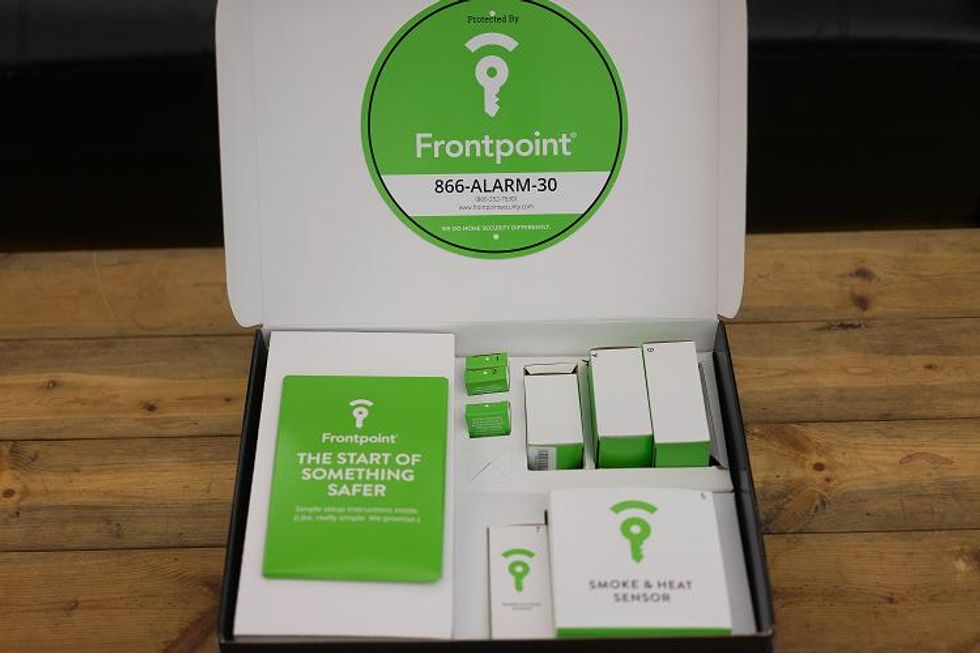
The first thing to do after opening the box is power up your control panel, which takes 45 seconds to a minute once you plug it in to the outlet. Then I would recommend opening up your Start Guide. On the second page there is a place to list all of your devices, which are numbered on each box. I recommend listing each device next to its corresponding number, and then rename the device so you remember where it is. This will come in handy when activating your system.
Installation
Next it was time to unbox each of the devices, and place them in key spots we had designated to secure our home. Here are a few tips when placing your sensors and devices around the house:
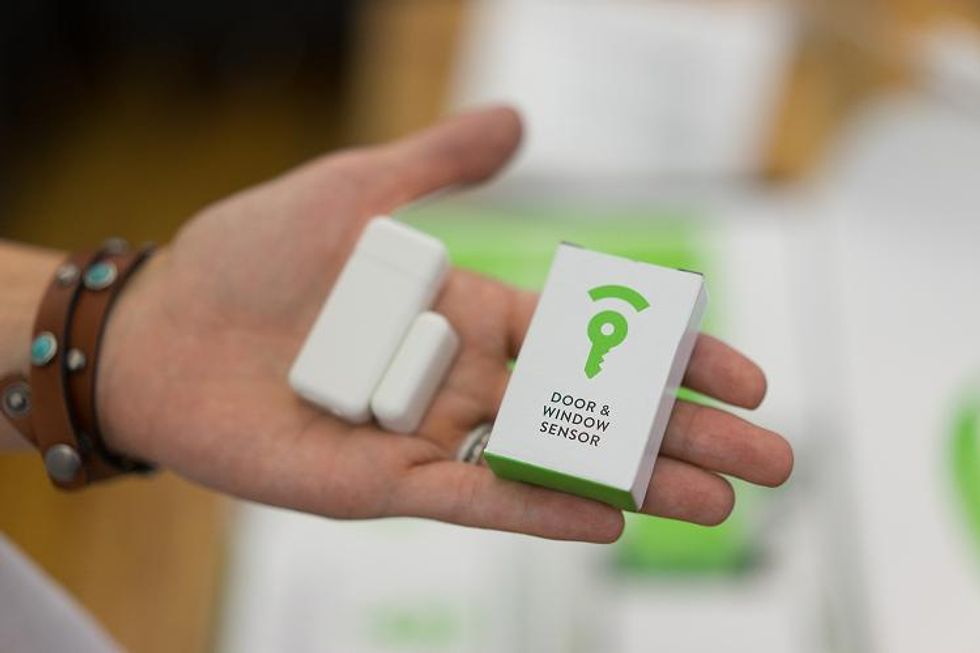
For door and window sensors, there are two pieces (one big and one small). The big piece is the transmitter, while the small one is the magnet. They work together to determine if a door or window has been open and closed. When installing these sensors make sure the arrow on the side of the transmitter (big piece) is aligned with the center of the magnet (small one). We also found you need to positioned the two pieces no more than a thumb's width apart. If you don't, the sensors will not work and the door/window will not be secure.
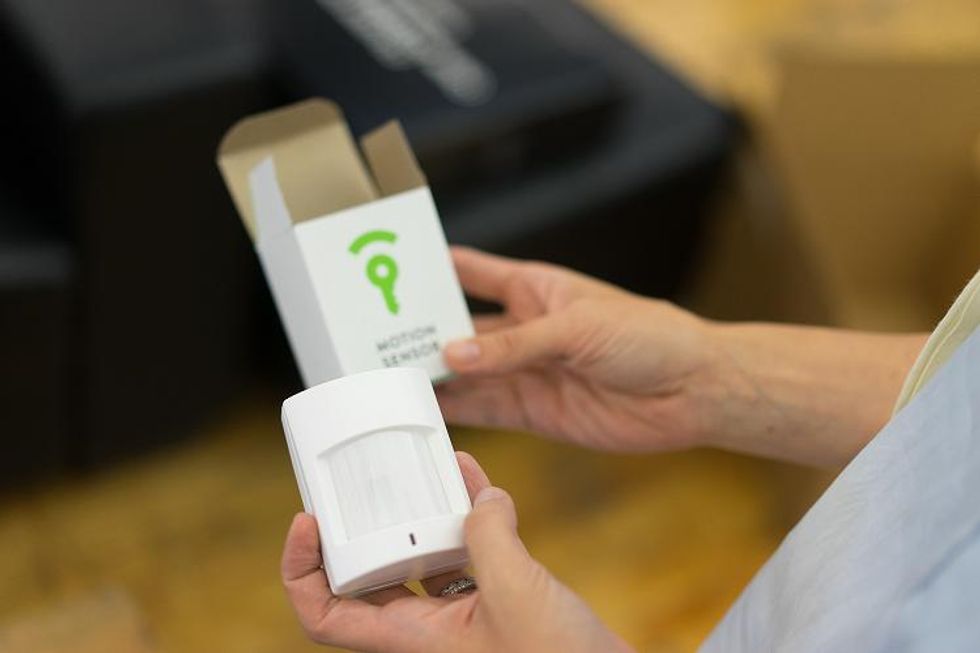
Once we placed our door and window sensors in their proper places, we started to find homes for our motion sensors. These are wireless devices that track movement around a room, hallway, yard, etc. Make sure you place these sensors to secure a large high traffic area of your house. They have a range of 80 degrees and can detect motion up to 25 feet away. Just make sure you place the motion sensor in the direction you want to secure. Also, keep in mind when placing these sensors they need to be 4 to 5 feet off the ground. They come with adhesive on the back so you can attach them to a wall or you can also place them on a shelf or bookcase.
Lastly for motion sensors, you need to take the back cover off the device and then put it back on. This is how you turn on the device. When you see the red light go on, you know it's working. You can also walk in-front of the sensor to see if the light goes on. if it does, the sensor is working. If the light doesn't go on, re-position the sensor and push up on the bottom of the unit. If the red light still does not go on, don't worry. When you call Frontpoint to activate your system, let the customer service agent know about the light so he can run a remote test to see if the device is broken.
Next up is the image sensor. This device is also placed in high traffic areas in your home. The image sensors have a range of 90 degrees and can detect motion up to 35 feet away. So if you have a big entrance way or a room connected to other rooms, this is a good sensor to use. This device needs to be placed about 6 feet off the ground, but come with adhesive on the back so you can mount the sensor on the wall. There is also a wall bracket which Frontpoint supplies. If you don't want to place the sensor on a wall, you can take the back off and place the unit on a shelf as longs as it's six feet high and covers the area you want secured.
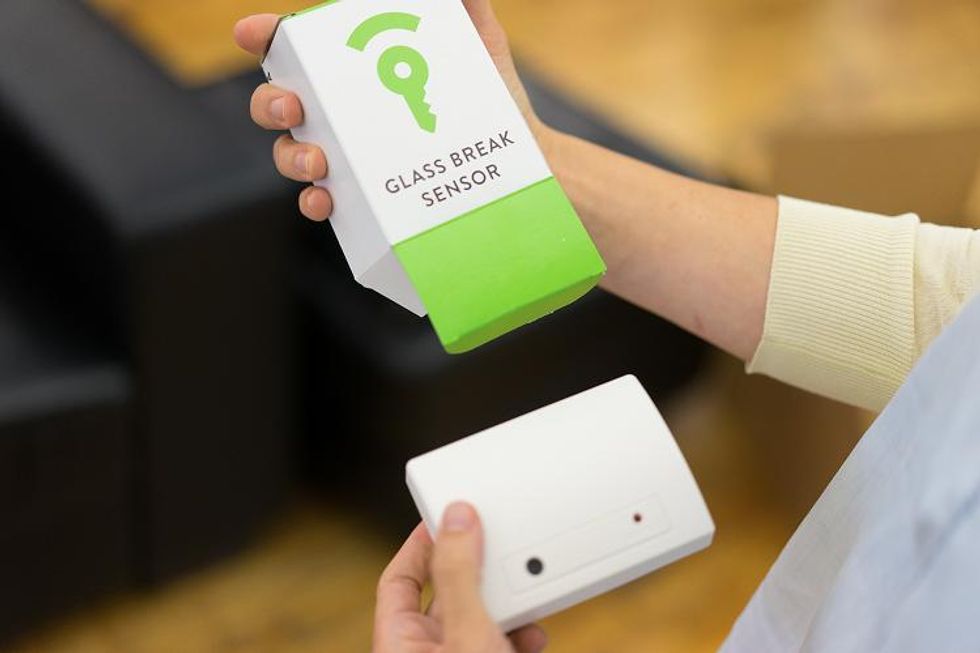
If you have a room with a lot of glass windows and want to secure them, we would recommend adding a glass break sensor to your Frontpoint system. These are mostly used to secure rooms like a den or bedroom that have more than one window. The sensor doesn't get placed on the window but anywhere between 4 and 20 feet from the window or windows you wish to protect. The glass sensor can be placed on a wall with its adhesive backing or you can place it on a shelf. We placed our test glass sensor in a room full with windows. Wherever you place your glass sensor, make sure you do not place the unit in the following areas:
Frontpoint's water and flood sensor comes in two pieces, with the transmitter placed about 3 feet from the ground.
Now we come to water and flood sensor. This little device is Frontpoint's leak detector. (To learn more about leak detector's, check out GearBrain's Smart Leak Detectors Make You Aware If There's Water Water Everywhere.) It comes in two pieces — a transmitter and detector. The transmitter gets placed 3 feet off the ground and the detector should be flat on the ground. The device is always monitoring and will alert you of leaks or flood conditions even if your Frontpoint system is disarmed. You need to place this unit in an area where you might get a leak, like a bathroom or next to a hot water heater or furnace.


Once I had all the devices in their proper place, and was ready for activation, there was one last step I found I needed to do. I downloaded the Frontpoint app, which is iOS (Apple Store), Android (Google Play), Windows (Windows Store) and Blackberry (Blackberry App World) enabled. I have an iPhone 6S, so I downloaded the iOS app which took a few minutes. Once the app was downloaded, I was able to log in using my Frontpoint log in information which was given to us when we signed up for the account.
During the setup process I was prompted to see if I was interested in using Apple's Touch ID for security purposes. I elected to do so because this is just another step to help secure my account. All I had to do is enter my Frontpoint pass code, then my phone's 4 digit code used to log on to my phone. Once done, the app was connected and was ready for activation.
So how long did all this take to do? It took me about 90 minutes to read all the directions, put all the sensors, devices and video cameras in their locations plus download the app.
Activation
When activating your system you can either call Frontpoint customer service or follow the instructions online. I would recommend calling Frontpoint. You'll find the process easier and faster than trying to walk through the steps alone. Also, any issues with the devices which could arise during the activation process get fixed faster when on the phone with customer service.
I called Frontpoint and was greeted nicely by Grant, our Frontpoint Customer Service Representative. I had to provide my pass code and last name on the account before starting. This is done every time you speak to Customer Service so keep your pass code in a safe location.
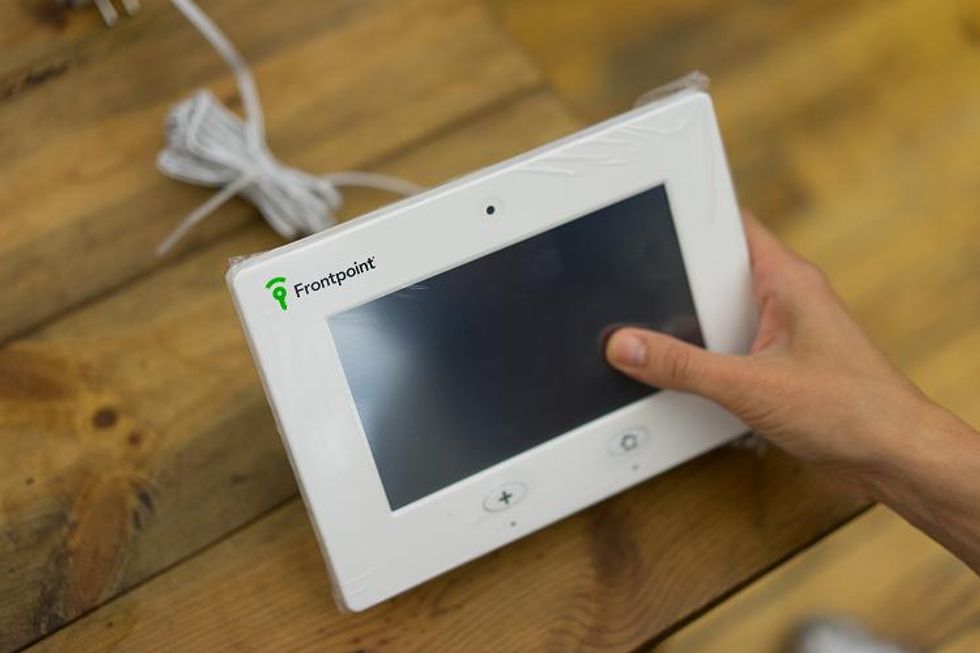
First up is our control panel, which Grant helped us with understanding all the features, including how to arm and disarm the system. Grant also explained how to change the entry delay and activation times, how the panic button works, and how best to arm and disarm the system when going to bed versus just leaving the house.
For instance, if you are leaving the house for work, you should have your entry delay timer set for 30 seconds. This means if you come into the house, you have 30 seconds before your alarm goes off. When you go to bed, you want to make sure your entry delay is turned off so if someone does break in during the night, the siren will go right off. This was a nice feature to see.
Another part of the activation process was checking all the sensors and devices online to make sure they were connected. When going through this process we found two of our devices were having issues. One was with the battery connection for our control panel and the other was with our glass break sensor. Grant walked me through the process to correct this issue, having me take off the back of the control panel, then unplugging and plugging the battery back to the device. Once completed, the battery showed up on our control panel as working and charging up.
However, the glass break sensor was malfunctioning due to a bad code, rare but possible. The fix was simply downloading new code, which our Frontpoint customer representative helped with, which included taking off the back of the sensor, reattaching it and resetting the connection through the control panel. This took about five minutes to fix.
Next, I set up our email notifications and video cameras, which Grant helped explain how to do. As I mentioned early in the review, the instructions for the video camera setup is not in your main Quick Start Guide. They are in the video camera box, and also online and on the mobile app. I would recommend using the online instructions since they are easiest to follow.
The first video cameras I set up was the Indoor one. This camera needs to be first connected to the web using either the supplied ethernet cable or any ethernet cable you might have at home, and needs an internet connection to activate. Once you're connected, log into your Frontpoint account and select video settings, then follow the instructions on the screen which are self-explanatory for connecting a video device. I found this to be very easy but it may take time to connect depending on your wireless connection.
I spent about five to eight minutes to connect and activate my camera to my account. There are two ways to sync your video camera with Frontpoint account: you can either follow the instructions on the screen or just add the MAC address which is on the back of your video camera. I used the MAC address and the camera connected very quickly.
Next up was the outdoor camera and this setup was a little different, requiring I use my smartphone to connect to Wi-Fi Alarm.com's Wi-Fi Network to get my video camera connected to the web. Then I used my computer to setup my video camera through my Frontpoint online account. Once this was done, I followed the same syncing process I did for the indoor video camera.
The cameras were then complete and connected, the system activated and running. All devices are working properly per my control panel and mobile app, and I would say this entire process took me about two hours to do which is not bad for a DIY system.
Summary
Overall, Frontpoint's system is very easy to install, and provides the protection you need for all areas of your home. Now that everything is set up, activated and working properly, the only thing you may want to consider is how to add additional home automation devices like smart locks or wireless thermostats. To link to Frontpoint's system, these extra devices must be Z-Wave compatible. If not, they won't work. (To learn more about why they will not work, check out our article What You Need To Know Before Building A Smart Home ) Frontpoint does provide list of recommended products/manufacturers that connect to their system. Listed below are a few to consider:
To find out more about Frontpoint or speak to a representative, you can either visit Frontpoint.com or call 1-844-238-7089.
GearBrain Compatibility Find Engine
A pioneering recommendation platform where you can research,
discover, buy, and learn how to connect and optimize smart devices.
Join our community! Ask and answer questions about smart devices and save yours in My Gear.