The Conversation (0)

Lutron
Lutron Serena Review: Rewarding Smart Shade Control, After a Strenuous Install
Unless you're Tim "The Toolman" Taylor, don't make Serena your first DIY project.
(Article updated on July 10, 2019)
Lutron does not make it easy to order, install or set up its DIY battery-powered wireless Serena shades. Each step brought hiccups, confusion and frustration from forced and unforced errors by both Lutron and myself. But after using the shades for a few weeks, I've decided that smart shades might be the smartest smart home product I've encountered, especially given the easy way Serena shades can be programmed and controlled.
Unlike so-called smart bulbs, which add unnecessary on/off confusion during the course of everyday usage, smart shades make smart sense since they are raised and lowered on a pretty regular single-cycle daily schedule, if even that much. Making shades wireless and smart simply gives you one less thing to think or worry about at home, and that made the whole unnecessarily pock-marked ordering and installation process ultimately tolerable.
Serena Ordering
Lutron's Serena are the only end-to-end DIY wireless shades in town. (You can read more about the limited wireless smart shade category here.) Serena also, as of this writing, are the only wireless shades controllable by Apple's HomeKit and Siri voice command and, hopefully soon, by Amazon Echo Alexa voice command as well. (Currently only Lutron's smart lighting solutions are Alexa voice controllable.) That makes these shades accessible to the you's and me's of modest means—compared to other wireless shade options compatible only with far pricier custom-installed smart home systems, and which must be custom installed.
You have two options to order Serena shades: online, via the company's online Design Your Shade web page, or getting walked through the process by a Lutron specialist (855-573-7362) seven days a week. After trying both, I found working with a shade specialist decidedly easier, yet I recommend starting with the online process first, to understand the shades.
Unlike other smart products that can be simply bought off-the-shelf and installed, smart shades obviously have to be customized for your particular windows. Shades are obviously more then a gadget—they are an integral part of your interior design.
As result, ordering Serena shades starts with this décor consideration. Once on the order page, you first choose the shade type: the standard familiar roller, or Honeycomb—think of a beehive that collapses like an accordion up and down—available in single-cell and double-cell. Unfortunately, the Serena site doesn't explain why a Honeycomb shade might be advantageous, and neither does the web page Lutron sent me to when I asked why.
You then choose your shade's power source, battery or AC. For this review, I chose the battery option but, again, Lutron fails to explain why someone would, or should, choose one or the other. What they don't tell you is you'll need 8 D cells—the big ones—which will last around nearly five years, depending on the shade size, if your shades are on a single up/down daily schedule.
You are then asked to pick a headrail option: "fascia," which means covered ($125 extra), or uncovered. You are then asked the type of window, or multiple windows, where your shades will be mounted: inside a window frame ("inside"), or either across or above the window frame ("outside"). You then measure the height and width of your window. Finally, you'll choose the fabric style and color, starting with your desired opaqueness—from sheer and translucent to room darkening—then fabric color. Blackout shades add an extra $45 to the cost.
Sample first
During my sample shade configuration, I was able to order free fabric 1' x 1' samples, but this option mysteriously wasn't made available during the online Design Your Shade process. If you want samples—and you do—go to Lutron's separate fabric sample order page. You can save the progress of your order and return to it once you've received, reviewed and chosen your fabric.
You then choose your desired type of radio frequency (RF) remote control, a thin thumb-sized Pico ($25) to control a single shade (or light), or a longer multi-shade (or lights) control ($99). You can choose "no control," which means you'd have to use the Lutron app on your smartphone or order Siri to raise and lower your shade.
Be aware that the Pico remote looks the same right-side up as it does upside down, which makes it impossible to use in the dark since you can't see which end is which. I had to mark the top so I knew I was pushing the right button.
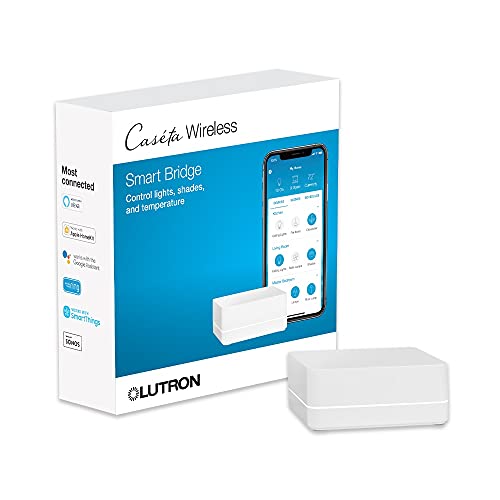
To control and automate your shade through your smartphone you'll need the Lutron Caséta bridge, which connects directly to your home Wi-Fi router via a standard Ethernet cable. The problem? Not only is the Caséta hub not included with the shade, you're never told you need the device during the ordering processing— and you can't just buy the hub by itself. You have to buy a Caséta kit, and all three Caséta hub kits, which include a remote (it's nice to have the second one) and some extraneous lighting accessories you may or may not decide to use. Why the Caséta hub isn't part of the Serena ordering process is a mystery.
In all, my single window, 3 x 6-foot blackout roller, battery-powered, Pico-controlled sample shade costs $610 (not including the Caséta hub), and it took around 10 days to receive the shade.
Irksome installation
 Installing the Lutron mounting rail will take some patience.GearBrain
Mounting your Serena shade consists of essentially two steps: attaching a mounting rail in front of the window, then clicking the entire shade assembly into that mounting rail. This sounds simple—but it isn't.
Your shades will come with two 11 x 17-inch, two-sided multi-fold dense paper instructions, one for the physical shade installation and one for the wireless set-up, are both disturbingly reminiscent of dreaded IKEA assembly instructions. Neither of the Lutron sheets is clearly labeled as to what each is and both are packed with too-tiny type and too-tiny illustrations, one in multiple languages.
Frustratingly, the instructions aren't specialized to the type of shade you ordered, which means you're confronted by multiple options that won't apply to your specific installation. Yes, that unnecessarily confuses the process, and I was constantly re-reading to make sure I was following the right step for my shade.
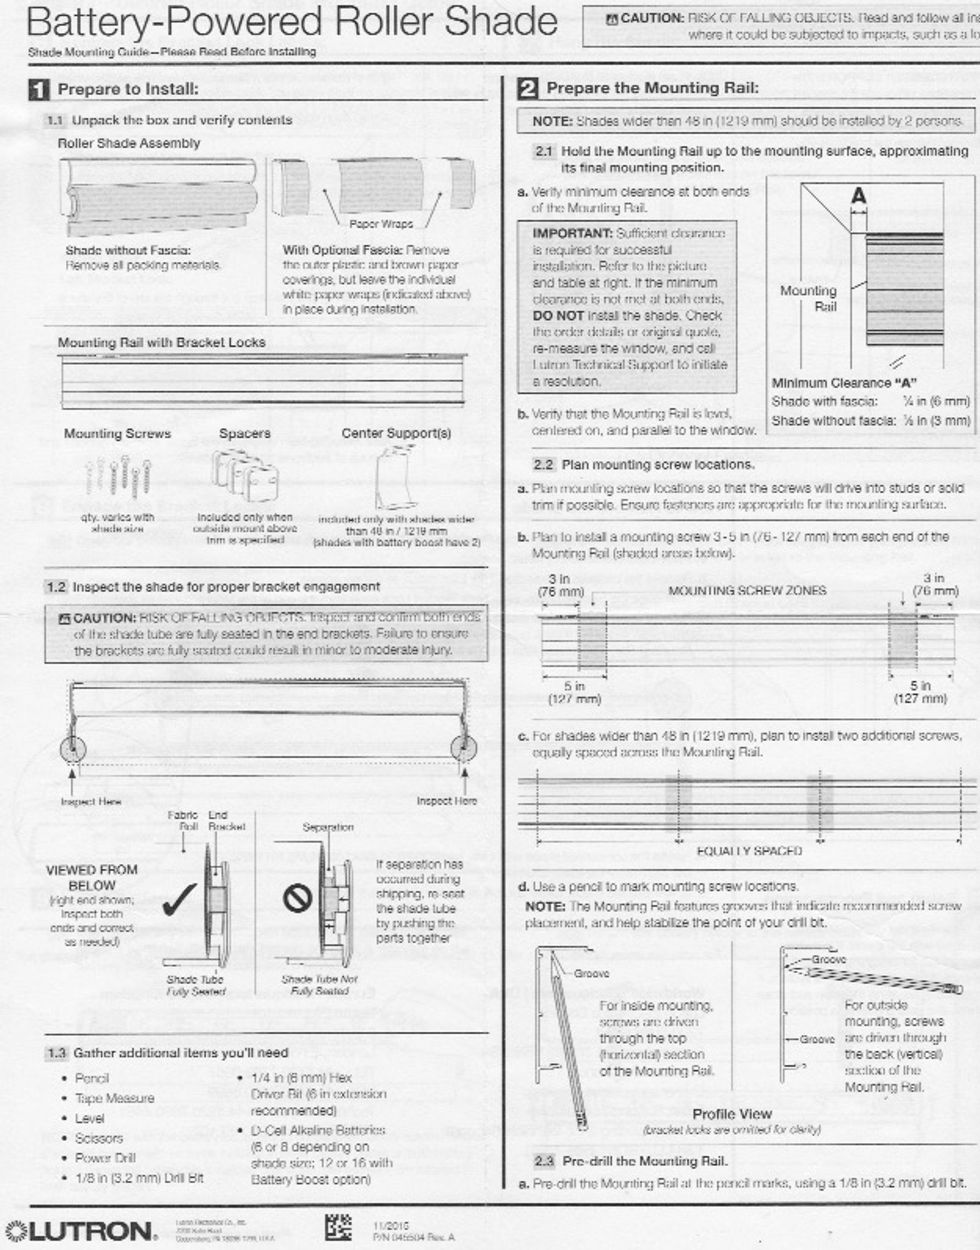 Pro tip: Go through the instructions before you start, and highlight the steps that apply to just your shade.GearBrain
My suggestion: Before starting the installation, use a yellow highlighter to mark the instructions applicable to just your shade.
Two other minor installation notes: One, the instructions say you need a 1/8-inch (3.2mm) drill bit. I found this bit too small for the screw to easily fit through the resulting hole in the mounting rail. Try a 3/16th first, or even a 1/4-inch. If you're mounting the shade into drywall and you need an anchor, you'll obviously need an even larger bit.
Two, if you're installing the shade inside a window frame, mount the mounting rail on the roof of the frame a few inches away from the window rather than flush with the back of the frame. Oddly, the instructions make no note of how close or far from the window you should mount the shade. But clicking the shade assembly to the mount requires a bit of depth, and if the mounting rail is attached flush with the window you won't have that depth.
It took me three frustrating trial-and-error attempts to get the mounting rail solidly mounted in the appropriate position, and several frustrating minutes and failed attempts to attach the shade assembly to the mounting rail. But in the end managed to get the shade hung. Total installation time: three hours. If the instructions were correct and clearer, it should and could have taken a third of that time.
Wireless command
Once physically mounted, you now have to pair the shade to its wireless remote control. The wireless set-up instructions, sans multiple options, are a bit easier to follow, but do require you to push a button on the underside of the shade assembly. So don't put your ladder away just yet.
You'll need to download the Lutron app, which can control any Lutron smart lighting products you may own as well, then pair your physical Serena remotes with the app. This pairing lets all your physical remotes and shades know what's happening, such as the current position of the shade and the set height you want the shades to rise to, regardless of which type of control you use.
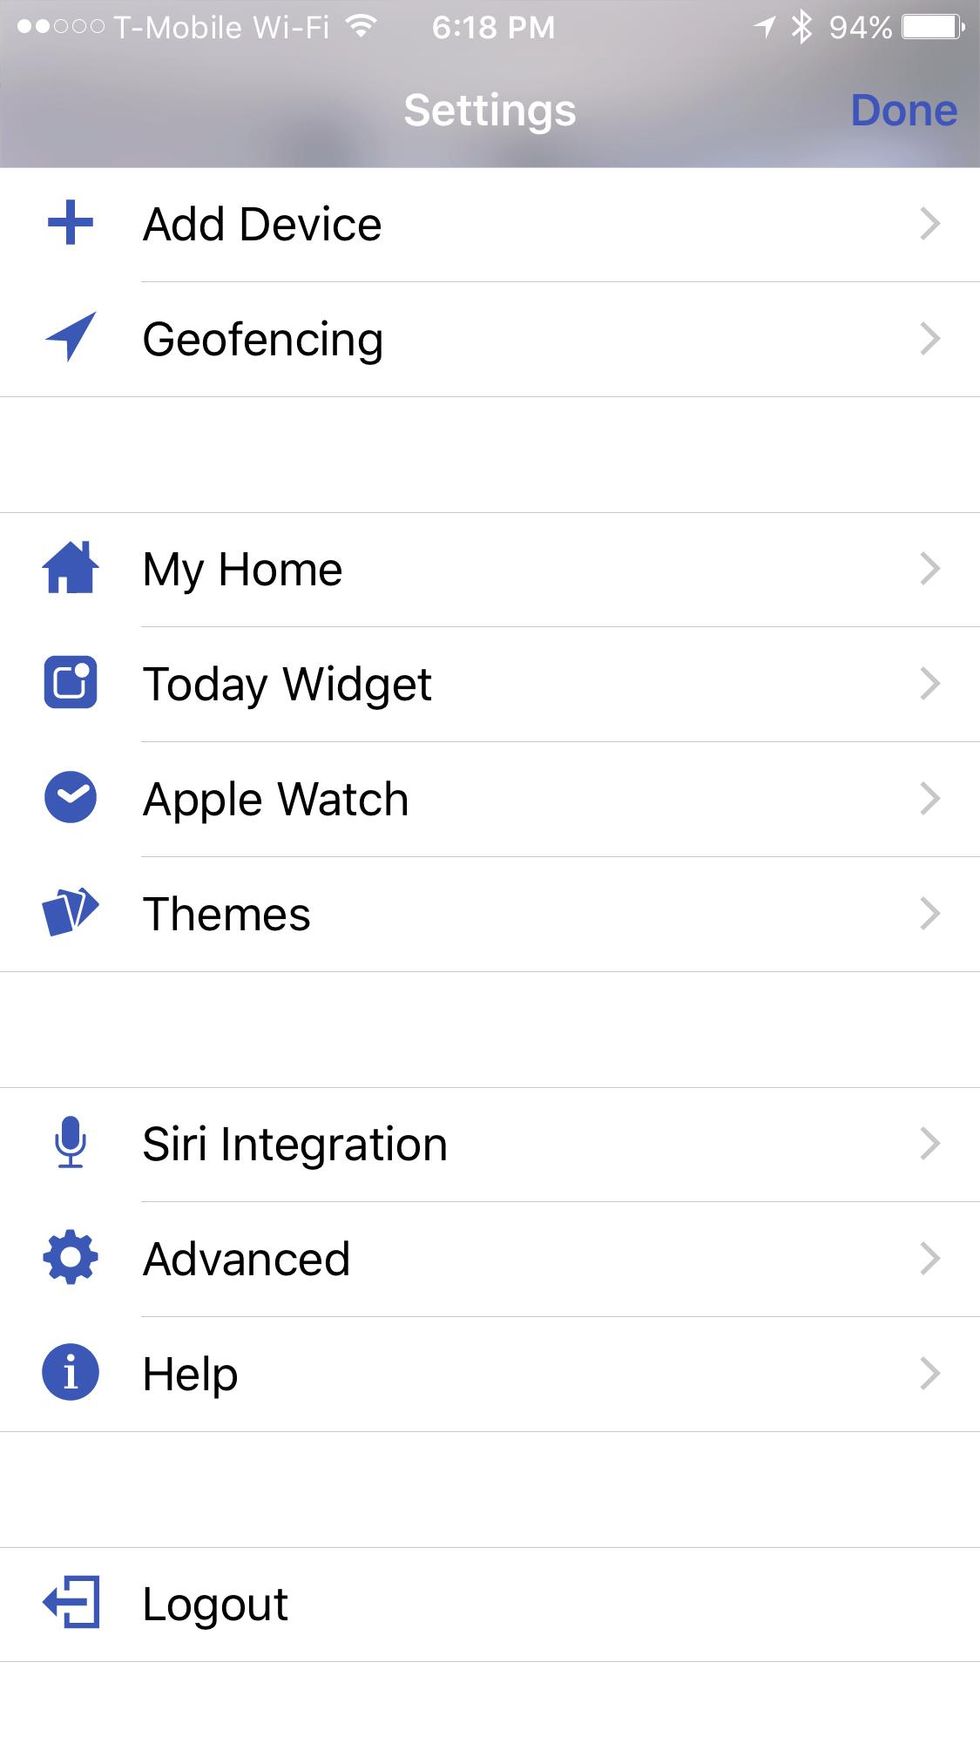 The Lutron app allows you to control your Serena shade, even set geofencing options.GearBrain
Within the app you can set up all the automatic operation and control options you'd like. You can create a regular daily schedule to automatically raise the shade to a specified height in the morning and automatically lower the shade at night. You can set up "scenes" that create an automated manual control operation for your shades, such as "movie" that drops the shades in the living room, or "morning" to raise the shades in the bedroom. You can set geofencing that automatically raise or lower the shades depending on your comings and goings. However, these varying command and control operations are sloppily scattered all over the app.
If you're an iPhone or Apple Watch owner, you can command Siri to do your Serena shade rise and fall bidding. To use Siri, you must make sure your iPhone or Apple Watch are connected to the network, created by the router, that you linked the Caséta hub to as well.
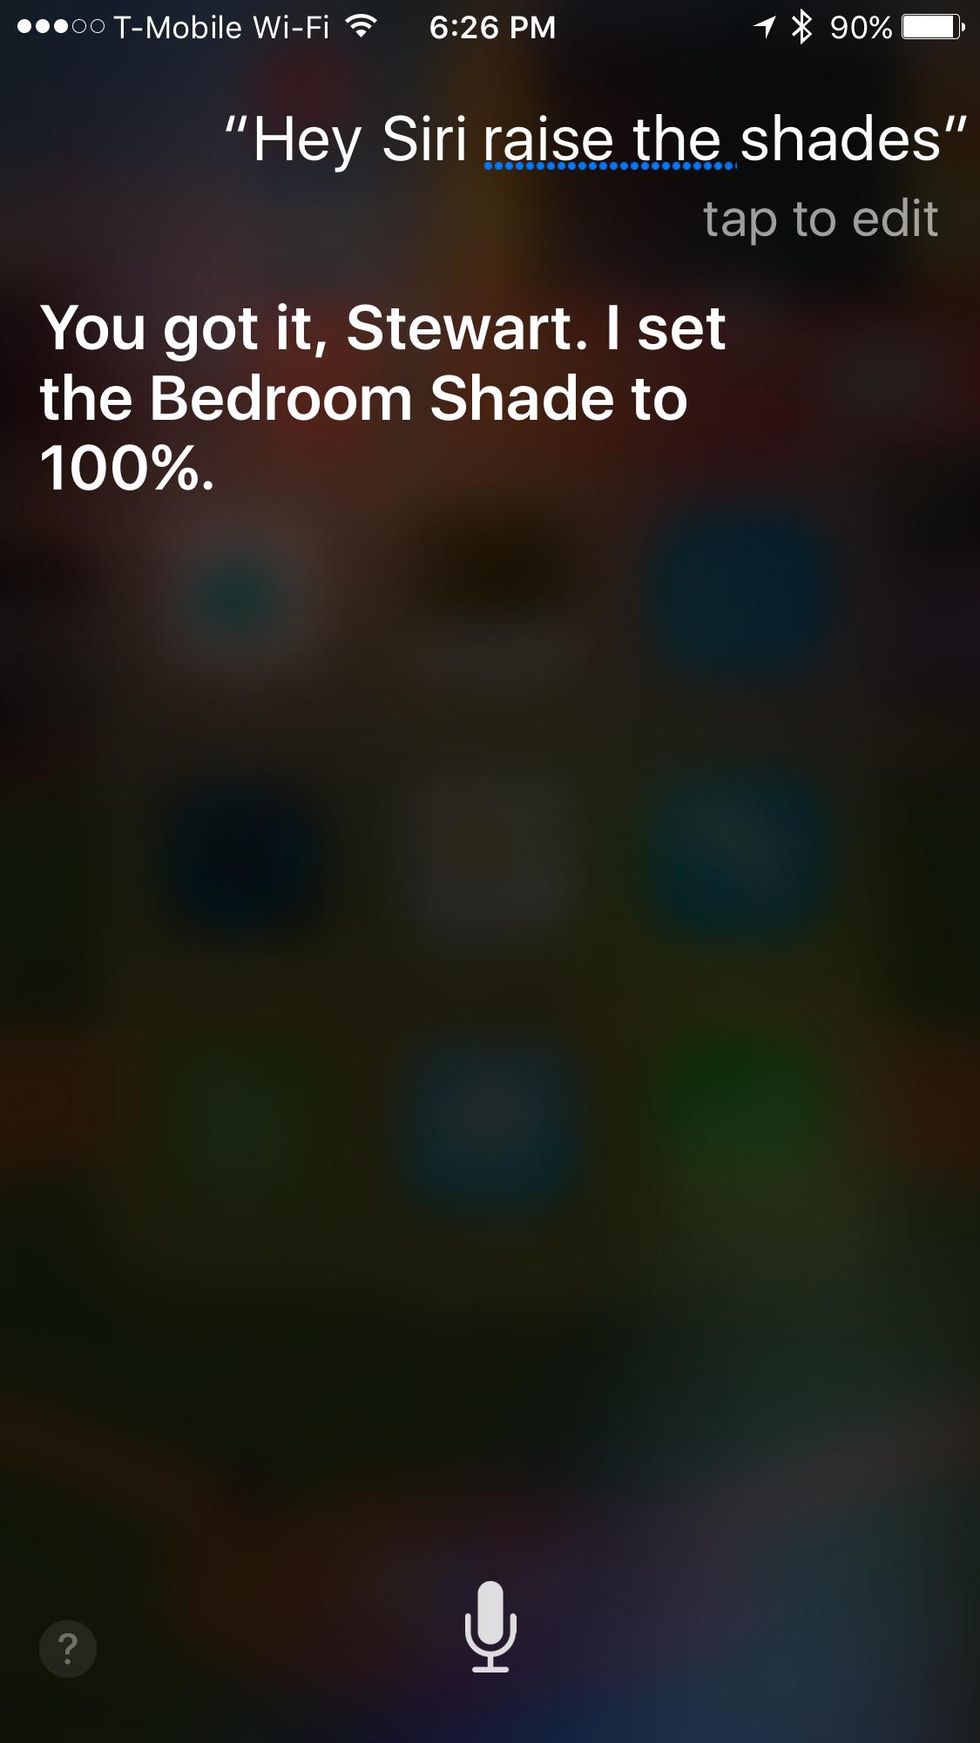 Finally, sweet smart shade control.GearBrain
Once I had my daily schedule scheduled, however, I rarely had to resort to any other control. The shades automatically go up at a certain time in the morning, then they fall at a certain time each night.
DIY? Maybe
As any amateur handyman can tell you, the whole rationale behind DIY (other than the cost savings of hiring a handyman) is the ego-stroking satisfaction that comes with the successful completion of a home hardware project. I certainly felt that flush of Tim Allen pride after finally getting the Serena hung.
Lutron should, and could, simplify and streamline the Serena order and installation process. But if you are confident with a tape measure, drill and screwdriver, as well as patient and an iPhone owner, Serena offers a rewarding shade control conclusion to your labors. Otherwise, I'd check out one of the other vendor-installed wireless smart shade solutions.
Pros: Simple to program, wireless controls, only wireless shades that work with Apple Homekit, Siri and soon Amazon Echo Alexa.
Cons: Difficult ordering process, confusing installation instructions, and a controller that makes operating the shade difficult in the dark.
GearBrain
GearBrain Compatibility Find Engine
A pioneering recommendation platform where you can research,
discover, buy, and learn how to connect and optimize smart devices.
Join our community! Ask and answer questions about smart devices and save yours in My Gear.