The Conversation (0)
Review: Flir One camera masters the art of thermal imaging
Flir One is a thermal imaging gadget that works even in a New York blizzard.
Pros: Dual thermal and low-res cameras, works for both iOS and Android, customize color palette.
Cons: App occasionally brings back to home, connection feels a bit loose on smartphone.
Thermal imaging is usually reserved for the domain of the professional: master workmen who have cause to check heat readings. (Note: this is not me.) Think firefighters, technicians looking for hot wires or plumbers. (Again, this is not me.) But as the technology has grown infinitely more affordable, and shrunk to consumer sizing, more devices have popped up for the smart home user. You might not think you have a use for the device but think again. Maybe you want to make an infrared movie, or maybe you like fixing home repairs on your own (and want to make sure you don't hit live wires.) In either case, a thermal camera could be a gadget you add to a wish list.
The $249 Flir One is a thermal imaging camera attachment built for consumer iOS devices including iPhones and iPads, and also Android devices. The company sent GearBrain its second generation iOS device to test, and we've put it through a warm home interior, and freezing nighttime blizzard conditions in New York City.

The gear
Flir One comes packaged neatly with the device, a USB charger, a protective case and a strap. You start by charging the device, and downloading the iOS app to your smartphone. I still use an iPhone 5S (yes, some of us still exist) and the app downloaded from iTunes quickly. Flir One flashes an orange light when it's first charging, which turns to a flashing green. When the light turns solid green, you're good to go.
The app asks the standard connected device questions: information about you, and also access to your location and photos. This bit of data will allow Flir One to tag your images to wherever you took them.
Instructions are not inside the app. You'll need to go online for those. And even those directions are fairly skimpy. I found a more thorough user guide which I turned to instead.
Basic instructions are pretty clear: You push the blue button on your screen when you want to snap a picture. You slide the menu button to select video (which, yes, you can take) and there's also an option for capturing a panoramic image. At the bottom, again, you select panoramic mode, push the blue button, pan the camera right or left, then push the blue button to stop.
Dual cameras
Flir One is unusual for a thermal reader in that the device has two cameras, not just one. Both the low-resolution regular camera and the thermal camera sit on the back of the device, and are side by side. The dual cameras make imaging more precise: you see the thermal reading from an object, but you also see outlines of the object itself. You can store your images in Flir One's library which appears in the bottom left corner of your screen, and you can also push the images out onto social media..
The dual cameras also mean you can align the two different images together to make something more clear. Because Flir One uses both the regular and thermal camera at the same time, sometimes the imaging is not aligned, so you end up with a heat signature not exactly on top of the actual item: a door handle, for example. You can select this alignment feature to make sure they do stack up, by sliding the alignment control manually.
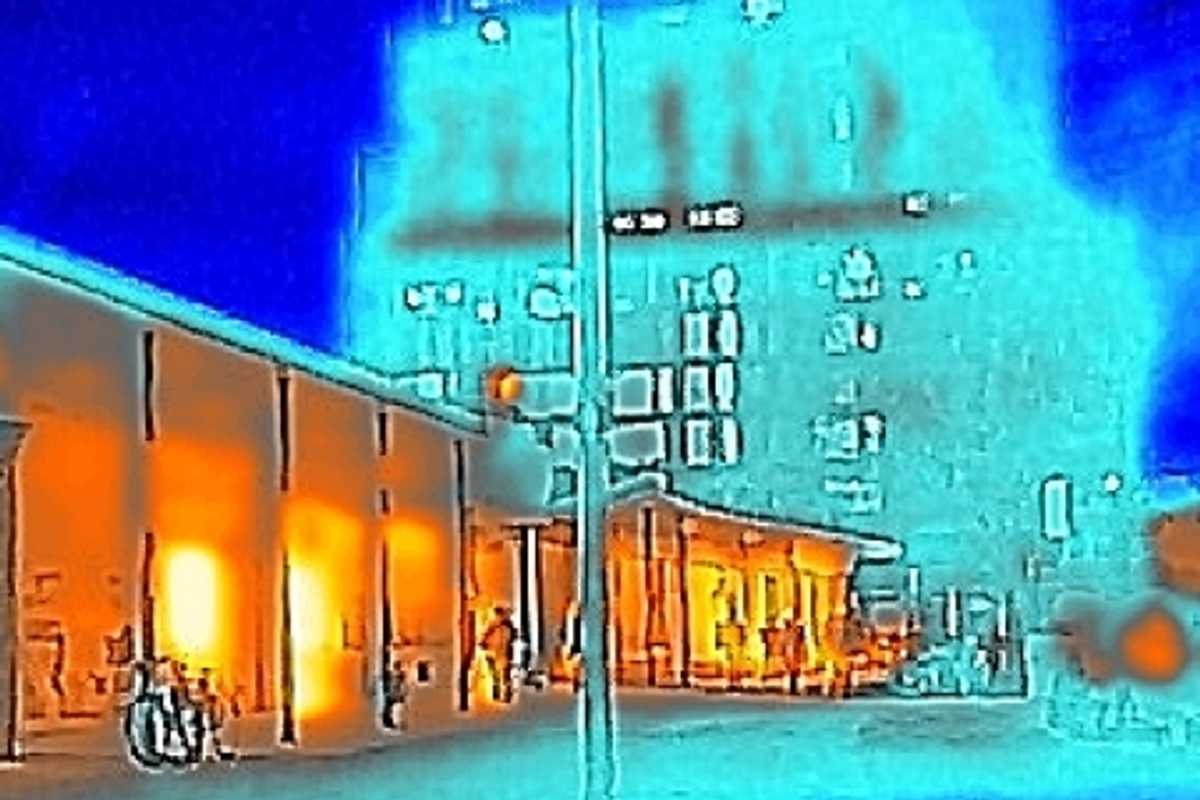
I also liked that Flir One allows you to change up its color palette. This allowed me to tune the device to read the way I wanted: I chose Arctic mode as the blue rang deep blue for cold. We were in a cold snap when I tested Flir One, and the windows gave off a deep ocean blue. As a recent blizzard took hold of New York, I used the extreme cold as an excuse to snap images, and read temperatures, of outside. Not bad. Cold gave off a deep blue. Heated buildings and street lamps turned orange.

Heat detection
Flir Uses a combination it says of visual light and thermal light to capture the picture. But it says it can take a picture even in total darkness. The images are however thermal images. This is not the camera for snaps of your beach vacation. Unless it was at night. Underground.
For those keen to see the temperature of items in its viewfinder, Flir One also has a spot meter which can pick up ranges, it says from -4°F to 248°F. You can set this to either Celsius or Fahrenheit in the settings. The device will automatically calibrate itself. But you can also manually calibrate Flir One. The heavily detailed instruction manual will walk you this process.
I'm a big fan of temperature readings—I am a data geek. So seeing a lightbulb in my kitchen pull a reading of 123°F and the window 70°F was fascinating. But I didn't buy it. The temperature outside that day was 22°F—which meant the glass had to be colder. And it was. In fact, the wavelength of the light that Flir measures does not travel through glass, and reads windows as if they were walls according to a spokesperson for the company. So the temperature reading was actually that of my home's.
Flir says that the device can be used to spot read around a window: and there detect cold spots, places where cold air could be leaking through a window pane. But do note: Flir One also admits temperature readings can be off, shifted by many details like distance from the object, time of day and even the temperature of things around the item you're measuring.
For these reasons, I would not depend on Flir One to give you an accurate, or exact temperature measurement of an item. If it thermally reads cold via the colors on the scale, or hot, expect a wide range there. Still, you can probably trust that something is going to be warm to hot or freezing.
Ease of use
One thing I immediately noted was how easily Flir One slipped off the bottom of my iPhone. That can be a plus, in that I didn't have to fight to get the camera off my smartphone. But it also worried me that it would slip off as I walked around with it. For that reason, I felt unsafe walking outside with the camera attached. Instead, I snapped it on when I got outside to use it. But at night, in the dark—when I might want to use the thermal device—this was not ideal. The company says a new version is due sometime in the next three to four months, which will allow Flir to a more snug fit to the phone.
Also, the app was a bit temperamental. Sometimes I couldn't take an image and the app would jump back to the home screen, particularly if I touched my smartphone's home button. I also found Flir One wouldn't launch the thermal camera unless I covered both lenses to start. The device also got warm just after a few minutes of use. To turn off Flir One, I just closed to app, and pulled the device off.
As far as thermal devices go, I found Flir One a solid option. I liked the dual cameras, which I felt produced a clearer more precise image. I think the pricing, at nearly $250, may put the device outside of the range for a general consumer device. But for those in need of a thermal camera—or even someone who may want to make an unusual YouTube flick—Flir One would be the thermal device to pick. Its clarity and ease of use make it a strong choice.
GearBrain Compatibility Find Engine
A pioneering recommendation platform where you can research,
discover, buy, and learn how to connect and optimize smart devices.
Join our community! Ask and answer questions about smart devices and save yours in My Gear.