

The Conversation (0)
GearBrain
How to set up the Airthings House Kit air quality monitor in your smart home
The three-part kit is a comprehensive way to monitor your home air quality
We at GearBrain have just started testing the new House Kit by Airthings, a Norwegian manufacturer of home air quality monitors. But since these devices take seven days to calibrate, we thought we'd write this setup guide now, then publish a full review once our system is calibrated.
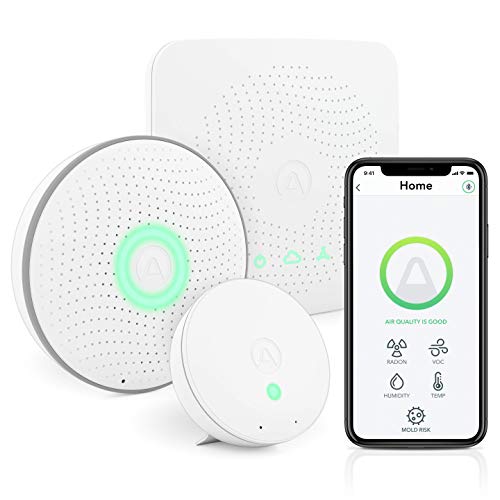
As a brief introduction, the $299 House Kit takes a multi-room approach to air quality monitoring by including the Airthings Wave, Mini and Hub. We have previously reviewed both the Mini and Wave in isolation, and also wrote about the Mini's new mold-tracking feature that was added in late-2020.
Read More:
This kit also includes the Airthings Hub, which gives the Bluetooth devices an internet connection for the first time, making it easy to check on your home's air quality remotely – useful for keeping an eye on the holiday home or your office.
Getting started
We already have the Airthings Wave app installed on our iPhone, as we have a Wave Mini in our bedroom. From this position, all that's needed is to take the new Mini and Wave from the House Kit and, one by one, add them to our existing Airthings system.
Users who are new to Airthings will need to download the free Airthings Wave smartphone app and create an account. You then just need to remove the plastic tab from the battery compartment of each sensor, which turns them on. At $299 this is a fairly expensive kit, so we were pleased to see that AA batteries are included for both sensors, and are said to last around three years.
Now tap the + icon in the top-right corner of the app, and the new sensor will be spotted almost immediately. Tap on the sensor then give it a name (such as Bedroom or Kitchen), assign it to a property (we chose our default home), and after a few seconds it will be added to your Airthings system.
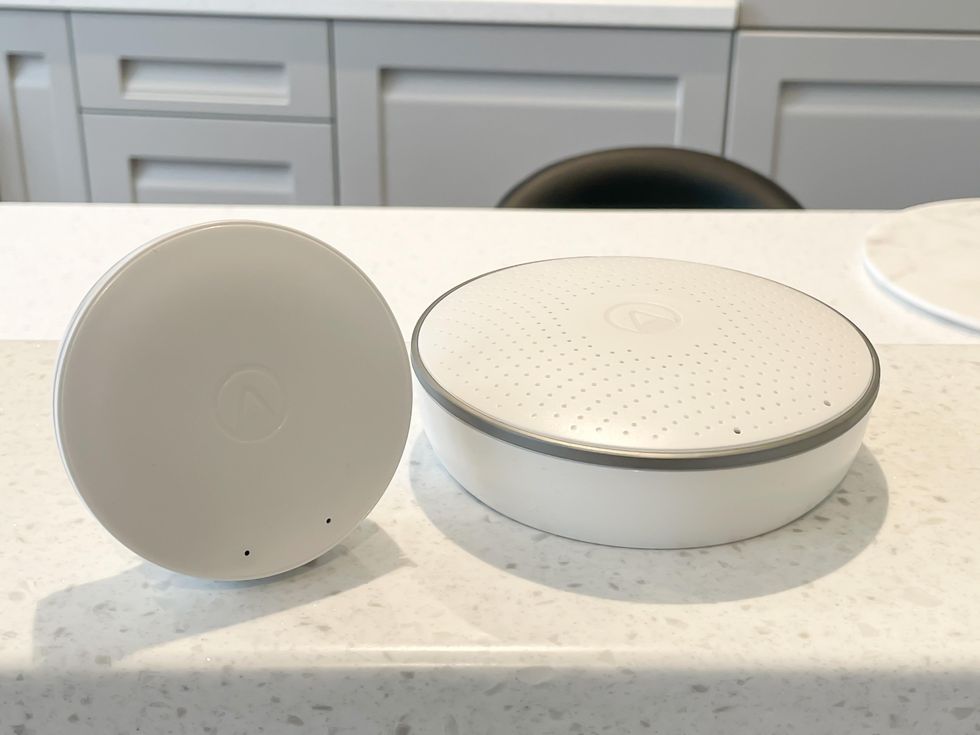 The Airthings Wave and Wave MiniGearBrain
Software updates
The Mini took no time at all to add, while the larger Wave required a software update. This was handled automatically by the app and took around five minutes to download and install. After that, the two new sensors can be viewed alongside our preexisting Wave Mini.
New Airthings sensors take seven days to calibrate, with the number of days left shown clearly in the app. However, during that time you can still view measurements taken by the sensors. These include VOC (volatile organic compounds), humidity and temperature for the Wave Mini, and the added metric of Radon for the Wave. They also give a general indication of air quality in each room, ranging from good, through to fair, and then poor.
Historical data isn't available until the seven-day calibration process is complete.
Airthings Hub
Adding the Airthings Hub to the system is equally easy. This connects to your Wi-Fi router with an included Ethernet cable and to a nearby wall outlet for power. Once it has been plugged in and switched on, head back to the Airthings app and tap the + icon again in the top-right corner, as if adding a new sensor.
This time, the app spots the new Hub and invites you to add it to your system. A couple of taps is all this takes, including the need to say whether you are in Europe or North America (due to the Hub using different radio frequencies depending on location).
Once set up, we turned off our iPhone's Wi-Fi and Bluetooth connections. Without the Aithings Hub this would prevent us from seeing the status of our air quality sensors, but because of the Hub's own internet connection we can still see each sensor. As such, we could also view this data when away from home, or even in another country.
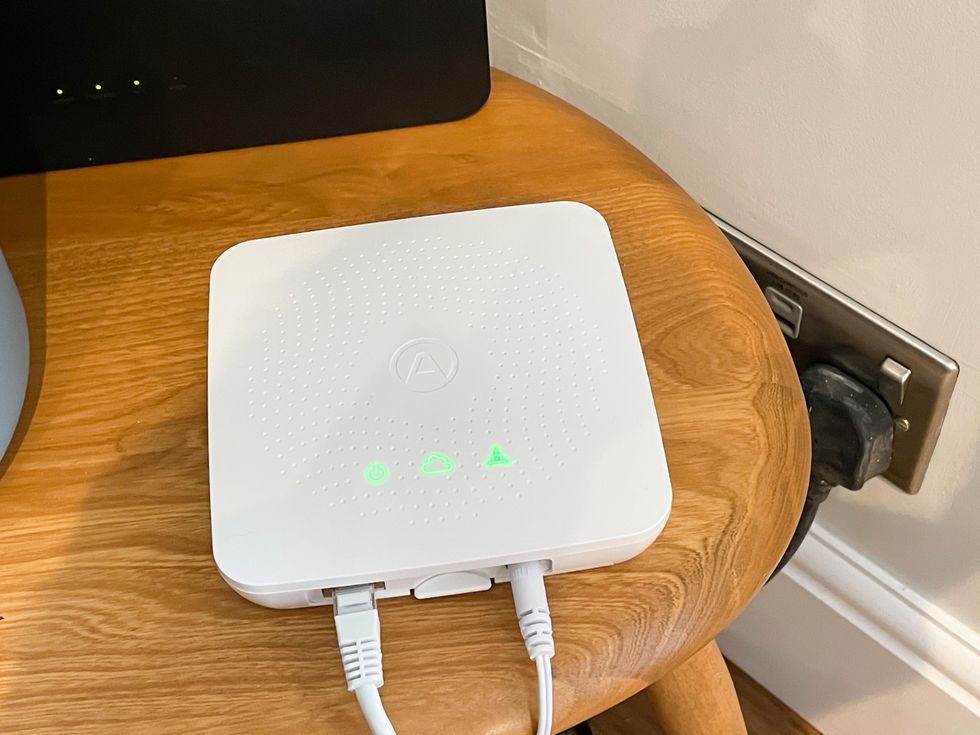 The Airthings HubGearBrain
Setting up Airthings with Alexa
Airthings devices are compatible with Alexa. To add the system to Alexa, all you have to do is follow these instructions:
You now need to enter the email address and user name of your Airthings account to pair it with Alexa and your Amazon account. Tap the Agree button on the next page then Close.
Unfortunately, the Alexa app can only be used to check on radon levels, which means the Wave Mini devices in our bedroom and bathroom cannot be used with Alexa. It's a real shame, and a strange omission, that Alexa can't be used to check on the temperature, humidity and VOC measured by other Airthings sensors. We also found the Alexa skill failed to find the Wave monitor in our kitchen, despite it being named correctly and capable of measuring radon. Hopefully this issue will correct itself once the system has calibrated, but for now Alexa integration feels severely limited.
Setting up Airthings with Google Assistant
The easiest way to connect your Airthings and Google accounts is to say to your Google or Nest smart speaker or display: "Hey Google, talk to Airthings." The assistant will then say it can't do that, but instead a notification is sent to your smartphone from the Assistant app. Tap this, enter your Airthings login details when prompted, and the setup is done. You can now ask Google Assistant on any device for the temperature, humidity, radon and VOC levels of your Airthings sensors.
While this worked initially, we have since found it impossible for the Google Assistant to understand our request to "talk to AirThings". It instead hears "talk to air things" and doesn't understand, or opens an app called Hair Things. Our initial conversation worked well, letting us hear about the temperature and humidity in various rooms, but since then we haven't been able to make Google Assistant understand that Airthings is one word. The company states how you can use commands like "Hey Google, check the air quality," but this isn't the case and commands like "Hey Google, check the humidity" do not work.
On the brink of giving up with voice control entirely, we said: "Hey Google, list my rooms" and it recognized that Airthings was required to act on this command, which it offered to open. We were then able to check on the readings of our sensors. While this works, it is far from ideal.
Voice control issues aside, we found the Airthings House Kit very easy and intuitive to set up. It only took around 15 minutes and all went smoothly, apart from when it came to talking with Alexa. We hope this issue will be ironed out once the system has been calibrated.
We will link to our full review of the House Kit here in the coming days.
GearBrain Compatibility Find Engine
A pioneering recommendation platform where you can research,
discover, buy, and learn how to connect and optimize smart devices.
Join our community! Ask and answer questions about smart devices and save yours in My Gear.