When you're looking for a home security system, the first step is choosing the kind you want to secure your biggest investment, your home. There are three primary types of home security systems: professionally installed and monitored, do-it-yourself (DIY) installed and monitored, and systems that are hybrids of the first two options. Vivint Smart Home falls in the first range: a professionally installed and monitored home security system. Vivint gave us a test install, a chance to try its robust home automation platform. This is the first part of a three-segment review — the installation — so you can see, step-by-step, what to expect when Vivint installs the monitoring network into your own home.
Arrival of Vivint Team
GearBrain scheduled a set time for Vivint to run our test house installation, and the team of four installers who arrived right on time. Stephen Scott, Bamidela Babaloia, Thomas Salamonowicz and Jordan Laguerre all wore Vivint apparel, making it was easy for us to identify them. They even put on slippers over their shoes to help prevent tracking of any dirt into the home — a nice touch.
![Vivint Smart Home System installers.]() Meet our Vivint installaers: Bamidela Babaloia, Thomas Salamonowicz, Stephen Scott, and Jordan Laguerre GearBrain
Meet our Vivint installaers: Bamidela Babaloia, Thomas Salamonowicz, Stephen Scott, and Jordan Laguerre GearBrain
Scott first walked me through a game plan of how the day would go, standard to Vivint's installation process, and made a point not to talk over my head. He and his team explained in detail every detail — from how each sensor worked, to where to place the devices for optimal performance. We also discussed the pros and cons of the placements in each room.
One of his first questions was where we wanted to stop a burglar from getting into the home: the inside of the house or the outside. Many people say the outside, noted Scott, so he described how installing window sensors on each of our double-hung windows on the first floor, make it possible to track unwanted visitors. These sensors have magnets, so they sit very nicely on the windows, and work via a wireless connection to their panel. A second sensor would also be installed inside each of the first floor rooms on the first floor, picking up the sound of broken glass and setting off the alarm.
Here are the Products Installed by Vivint
Before installing any devices, Vivint team layouts all the connected devices they will install in your home. The following slides will show you what devices they installed.
In the test home's living room, we have four windows, where Scott also suggested installing sensors and a glass break sensor. When it came to the control panel, Vivint recommends a central location with access to Wi-Fi, that's also easy to arm and disarm. The team had a special app to measure the strength of the Wi-Fi signal in the home, and the location of our previous panel placement was perfect for the new one.
We then discussed camera placements, as we were installing one inside camera, one video doorbell and one outside camera. All of Vivint's outside cameras are wired using CAT 5 cables, and then connected to a powerline adapter, or PLC, via an Ethernet connection. A powerline adapter is a G.hn-based device that provides another way to connect devices to a home or business network. Using the existing electrical wiring in your home, the PLC can send a wireless signal to devices at speeds equal to a wired connection. Vivint uses this technology to help get a better wireless signal between their devices (especially between security cameras) in your home, without having to rewire.
![Vivint powerline converter or PLC used to send wireless signal over your electrical wires.]() Vivint PLC (Powerline Converter) used to send wireless signal between security cameras and Smart Hub panel (formerly called SkyControl panel). PLCs sends signal through your home's wires.GearBraiin
Vivint PLC (Powerline Converter) used to send wireless signal between security cameras and Smart Hub panel (formerly called SkyControl panel). PLCs sends signal through your home's wires.GearBraiin
For Vivint's indoor security cameras, these devices connect via wireless signal (no PLC needed) and can be moved to any room you want to keep an eye on when you're not home. Its doorbell is very similar to the other types of wired doorbells GearBrain has tested (i.e. Skybell and Ring). The device requires a 12V wired connection to work properly, and connects to the panel via a wireless (Wi-Fi) connection. We decided on the placement of the cameras, and the team got to work.
Installation of Your Vivint Panel
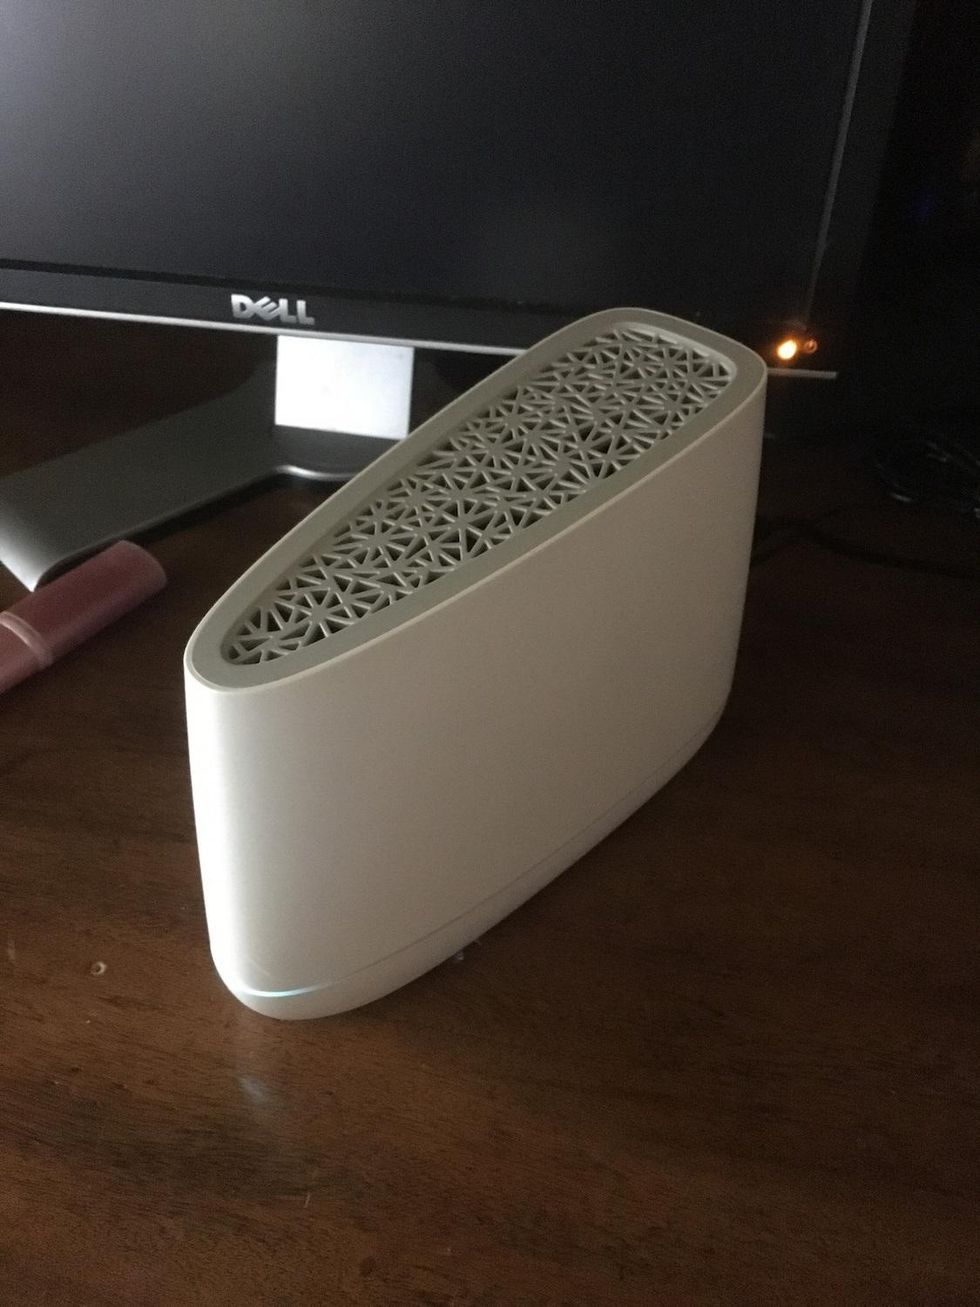
According to the team, the new Vivint Smart Hub panel (formerly called SkyControl panel) is a 7-inch color LCD touchscreen, and was designed by a former Nike marketing executive who joined the company in recent years. It looks a bit like a tablet mounted on the wall. Many of the panels we've tested for home security systems have a boxy look, and quite a number of buttons. Vivint's panel stood out as cleaner, better designed, and it fit nicely on the wall. The panel includes a speaker, a microphone and LED lights underneath that change colors depending on whether the system is armed or disarmed.
![Vivint Installer installing Vivint Smart Hub.]() Vivint installing Smart Hub panel in optimal location in our test house.GearBrain
Vivint installing Smart Hub panel in optimal location in our test house.GearBrain
The Vivint Smart Hub requires two wires for power, using PLC plugs to transfer the wireless signal to a wired signal across your home's own electrical wires. Scott mentioned the signals sent from the devices are big, and require two PLCs to work correctly. Video from the security cameras, for example, take up a lot of data — and it's much easier to send them over a wired connection versus a wireless one. The new Smart Hub panel, expected to launch sometime this year, will only require one PLC plug for power, said Scott, which will make its installation easier.
Installing the Vivint Smart Hub panel took a little longer than normal in our test home. The team was able to run wiring behind the wall to a power source in the basement after several minutes. I noted the care the team took, and they were cautious about the holes they made in the wall, cleaning up as soon as they installed a device, using a battery powered ShopVac, and a trash bin they filled with empty boxes, wiring ends and wrappings as they opened each device.
![Vivint installers wear protective footwear to keep your home's floor clean.]() Vivint installers wear disposable slippers in order not to track dirt into your home.GearBrain
Vivint installers wear disposable slippers in order not to track dirt into your home.GearBrain
Sensor Installations for Doors and Windows
One team member was responsible for installing door sensors, taking the time to place them inside the door frame, for optimal performance. We have steel frames in our test home, not wood, but Vivint was still able to drill into them, installing the sensors, and using a silicon sealant to secure them. Vivint's door sensors are battery powered and connect over a wireless signal.
Next up, installation of security cameras
As one person installed the door and window sensors, two worked on the security cameras and video doorbell, a wired device that requires a 12V wired connection. We installed the doorbell next to the back door, putting it closer to the router, and the doorway that gets the most traffic coming and going.
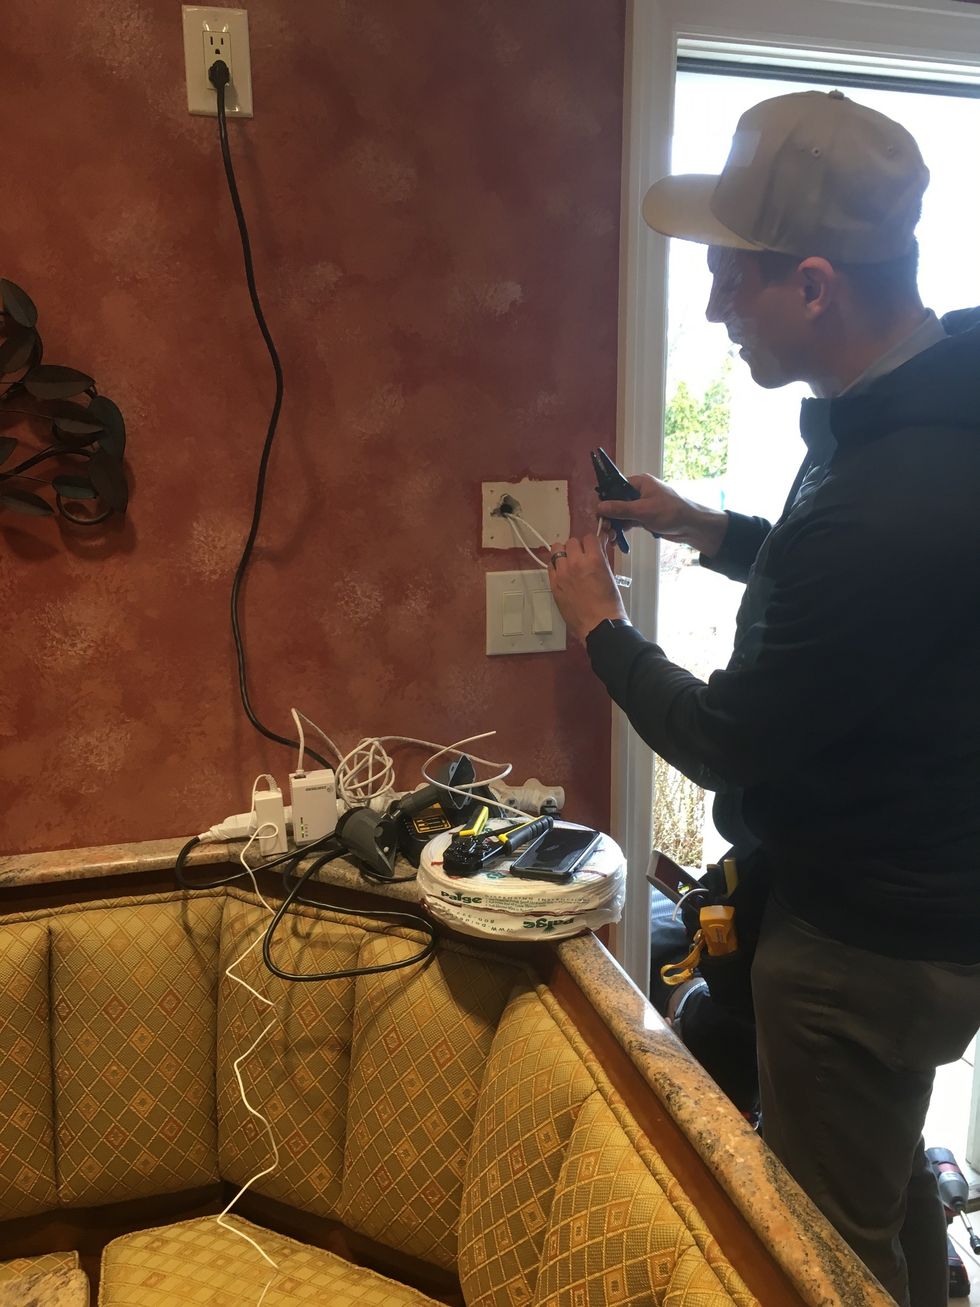
Next up was the outdoor security camera, which we positioned on the front porch, as Vivint said it was the best place to cover the porch, front walkway and front lawn, and also because it was close to an indoor power source.
![Vivint Installer installing outdoor security camera using PLCs.]() Vivint installing outdoor security camera using PLCs.GearBrain
Vivint installing outdoor security camera using PLCs.GearBrain
Vivint's outdoor security camera is HD 1080p with night vision, that needs to be plugged into a power source. Many homes don't have outlets on the outside of their house — nor does our test home. So we needed to drill a hole through our wall on the outside of the house to an indoor outlet. Steve suggested a few options, and we picked one where the CAT 5 cable would be less noticeable because of a tree on the property. Once inside, the cable was connected to PLC plug via an ethernet connection and plugged into the wall socket.
The third security camera was the one inside the house, which can be plugged into any wall outlet. This camera is moveable, you can place it in any room you want, and can be screwed on the wall or placed on a shelf, which is where we opted to place it. The Indoor security camera comes with a two-way microphone, letting us not only see, but talk with anyone in the room.
![Photo of Vivint's smoke, carbon monoxide and freeze detector on a basement wall.]() Vivint installed smoke, carbon minoxide, fire and freeze detectors on every floor of our test house. This is the basement placement.GearBrain
Vivint installed smoke, carbon minoxide, fire and freeze detectors on every floor of our test house. This is the basement placement.GearBrain
Installation of Fire & Smoke Alarms
All homes require smoke or fire alarms, particularly with a home security system that is professionally monitored. Vivint's is called Smoke 3 Fire, which is battery-powered and can detect smoke, heat over 120 degrees and freezing temperatures below 40 degrees. I asked the team where they suggested placing these devices, and they mentioned the placement code for all smoke detectors: one goes outside the kitchen, one outside your living quarters or in every bedroom, and one goes in the basement. Each alarm was secured into the ceiling in each location.
Integrating Other Smart Home Devices
One of options Vivint offers is to add additional smart home devices to its platform. You can choose Amazon Echo and Google Assistant smart speakers, Nest Thermostats, Philips Hue Lights, Kwikset smart locks and Linear Garage Door Openers. The platform also works with any Z-Wave device. For our installation, we asked Vivint to install Yale Assure Smart Locks (a Z-Wave version), a Nest Thermostat, an Amazon Echo and Philips Hue smart lights. Everything worked — but there were some challenges during the on boarding process, which we will run through during the second part of our Vivint review
![Vivint installed Nest Pro Thermostat on a wall.]() Vivint systems integrate with other smart home devices like Nest Thermostats, Yale Assure SL Z-Wave smart lockes and others.GearBrain
Vivint systems integrate with other smart home devices like Nest Thermostats, Yale Assure SL Z-Wave smart lockes and others.GearBrain
Last Stage of Installation Process: check to make sure everything works
After all the devices are installed, Vivint runs a diagnostic test though the Vivint Smart Hub panel, to make sure they're working and are properly connected. Every window is opened and closed, as well as doors, glass detection sensors are checked, along with cameras, doorbells and any other connected device.
These tests are key to uncovering any installation hiccup, which can happen. The team found a bad signal coming from the video doorbell, pinpointing the problem to low voltage on the wiring. Our wired connection was only 11V, not 12V, needed to power the device. The team sliced the wires, and got the power to 12V, re-connected the doorbell to the panel, and everything started working.
Last Step - Training
Once all the devices were up and running, Scott walked us through the how to use the system. We started at the Smart Hub panel, going through each screen. He showed me how to arm and disarm the system, access cameras and videos, as well as how the app worked, and where to set things up like Rules.
Finally, we electronically signed our agreements via Vivint's app which included a consent form, a PSA (service agreement) and then your finance application, which includes the cost of each devices, along with the monthly service fee and terms. You're also going to talk with a Vivint customer service person who will ask you a series of questions to confirm that all the devices you purchased were installed, that they are up and running, and that the Vivint installer has explained how the devices, the system and the app work.
Overall, the installation process took the team slightly less than five hours to set up the system, from start to finish. I've found on average an installation like this might take three to four hours. We, however, had several smart home devices to add to the system, had some issues with running the power line for the panel, connecting the doorbell and installing the outdoor security camera, which likely added an extra hour to the installation.
![Vivint mobile app showing devices you can add to your Vivint Smart Home System.]() Vivint mobile app for onboarding smart home and security devices.GearBrain
Vivint mobile app for onboarding smart home and security devices.GearBrain
Cost
Vivint's system is like a premium car. There are a lot of features, and the system performs very well — but it's all at a cost. Vivint Starter Kit cost $549, which includes a touchscreen panel, two door or window sensors and one motion sensor. You can easily add products a la carte (e.g., smart door locks, thermostats, indoor and outdoor cameras, doorbell camera, voice control through Google Home), paying for them upfront or with a no-interest loan. Also, note that Vivint offers zero-percent financing through its banking partner, Citizens Bank.
You're also going to pay a one-time installation cost of $199, plus there are separate monthly service plans that start at either $39.99 for the Smart Home plan, or $49.99 for Smart Home Video, which comes with security cameras. Vivint does offer no-contract option plans if you are interested.
For our test house, the total cost for our system would have been $2,790. Vivint says customers typically finance the equipment cost over a three to five-year period, and if we had financed the system through Citizens Bank at zero-percent interest, we would have added $46.51 a month to our service plan, on top of the $49.99, bringing the total monthly cost to $96.50 plus taxes which could be viewed as a rather steep monthly cost for some homeowners.
How does this stack up against the other professionally installed and monitored systems? We found the range for a monthly fee from a professionally installed and monitored home security company like Vivint can range from $29.95 to a high of $79.75. This can vary depending on the number of security cameras you have, how much video you store and the length of your contract. Vivint does not require a contract, while other home security providers, like Xfinity Home and ADT, require a two or three year contract.
The other costs to factor in are the installation, and the renting of the devices. Installation charges can range from $99 up to $499 — Vivint charges $199. A professionally installed and monitored home security system is also going to charge a monthly fee in the range of $50 to $100, depending on the devices and terms of the contract.
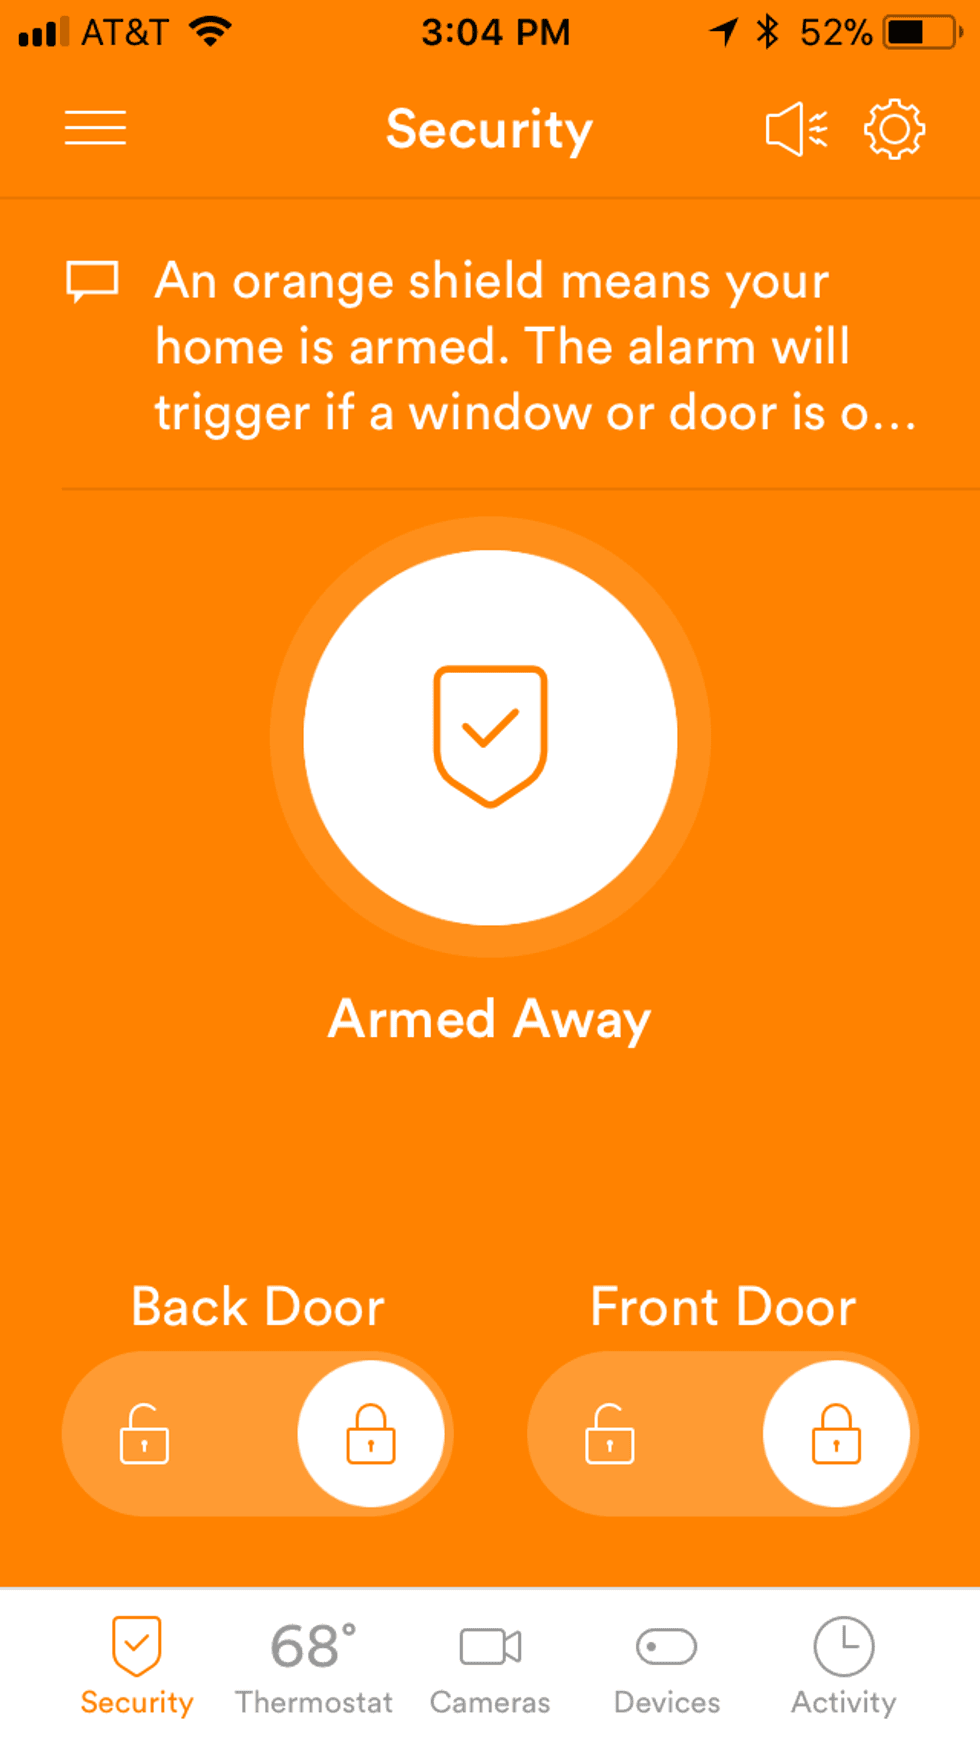
![Vivint mobile app showing dashboard color orange which means Vivint Smart Home system is armed.]() Vivint system is easy to use and effectively secures your home. This is the "Armed Away" screen on the Vivint mobile app.GearBrain
Vivint system is easy to use and effectively secures your home. This is the "Armed Away" screen on the Vivint mobile app.GearBrain
Summary
First, I want to thank the team — Steve, "Bam", Tom and Jordan — for an excellent job installing Vivint's system in our test house. Though it took close to five hours, I found the experience to be a pleasure, and if all of Vivint's installation teams are as good as these guys, you're in for a good experience.
You might be saying to yourself, though, that the cost for a professionally installed and monitored home security system is not cheap. You are right. Many consumers are going to find this plan too expensive, or may not be able to pass the credit check needed to finance the system. If a monthly cost between $50 and $100 is within your budget, you should then decide which system you want to install and use to secure your home. Are you comfortable with installing connected devices or would you rather call someone to do the work? Do you want the authorities to be notified when there is a break-in, or do you want to be the only one contacted? Do you want to add smart home devices, like a smart thermostat or lights, to help you save money? All are valid questions worth addressing before getting a home security system.
Our recommendation is to think about the investment you made buying your home. You're likely paying between $50 and $100 a month for your monthly phone contract — and a home security system may feel as necessary to you as a smartphone . In part two of our Vivint review, we'll go through how each device performs, and challenges adding our own smart home devices to the Vivint platform, which we hope will also help inform your decision.
Read More:
Check out The GearBrain, our smart home compatibility find engine to see the other compatible products that work with Vivint Smart Home Security System, Google Assistant and Amazon Alexa enabled devices.
myQ Chamberlain Smart Garage Control - Wireless Garage Hub and Sensor with Wifi & Bluetooth - Smartphone Controlled, New Design, myQ-G0401-ES, White
From Your Site Articles
Related Articles Around the Web